Installation & setup
Installation & setup
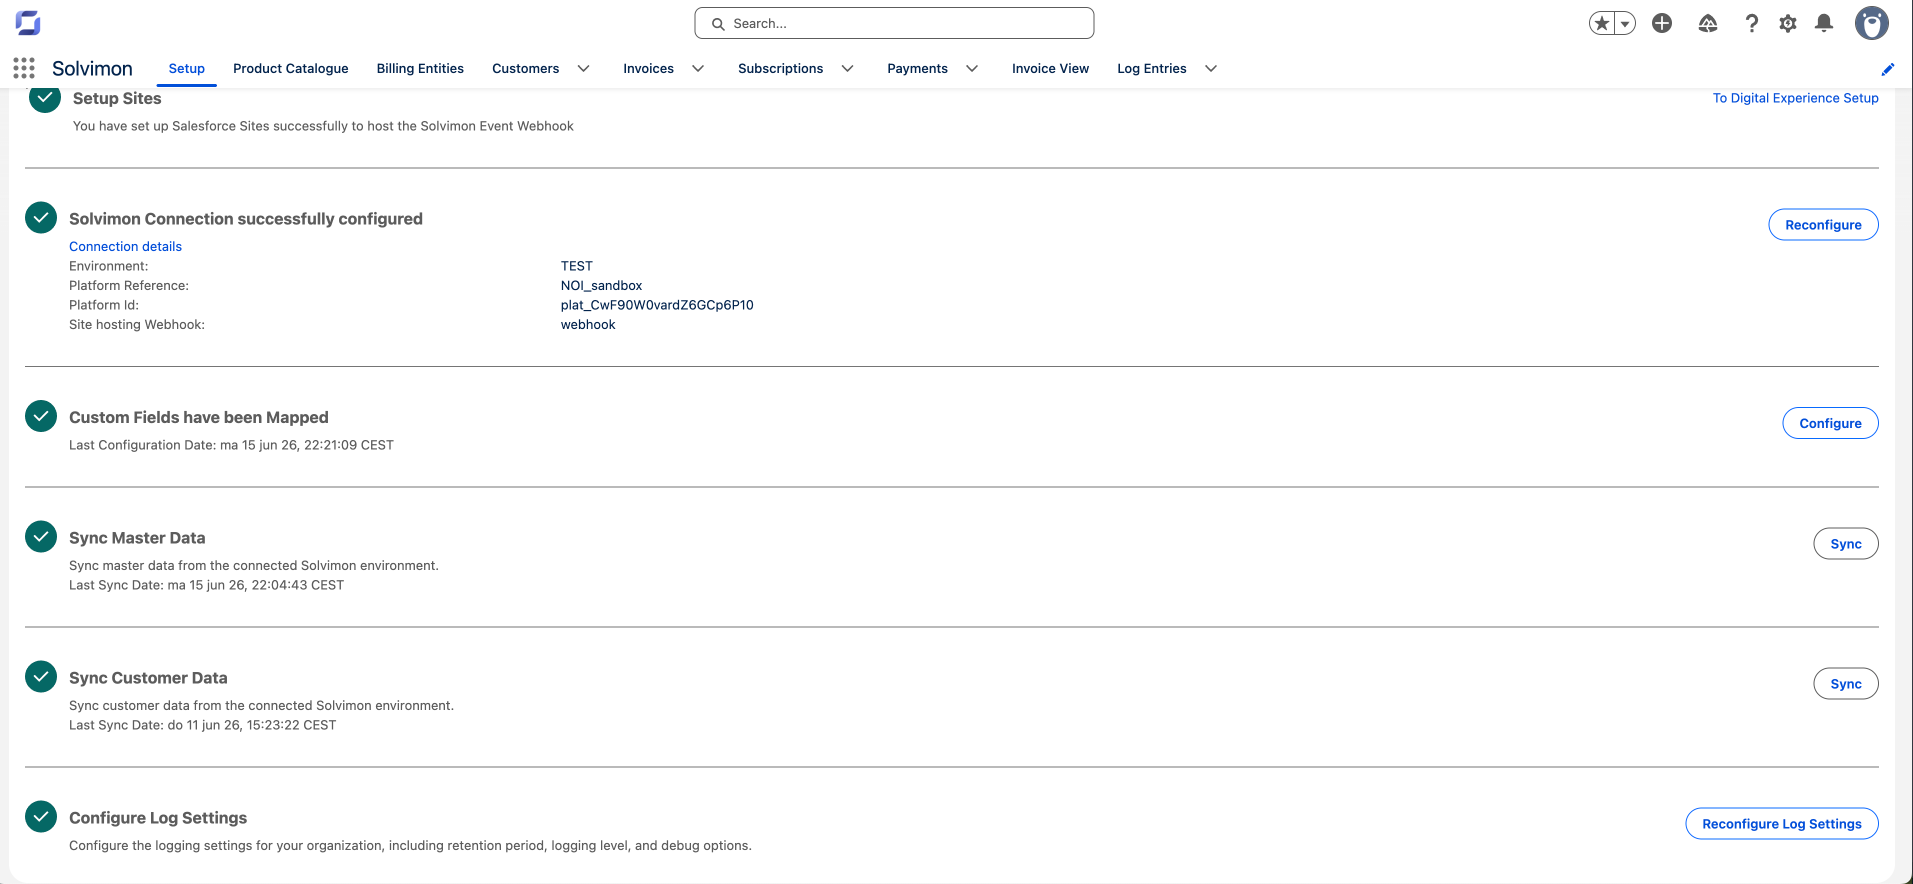
Getting the Solvimon app running in your Salesforce org takes four steps: install the package, connect to your Solvimon environment, sync your product catalog, and sync your customer data.
Prerequisites
- Salesforce org (Enterprise edition or above recommended)
- Solvimon account with a Platform ID and API key
- System Administrator profile in Salesforce to complete setup
Step 1: Install the package
Install the Solvimon managed package from the Salesforce AppExchange. Once installed, the Solvimon app appears in your App Launcher.
Open the app and navigate to the Setup tab to begin configuration.
Step 2: Connect to Solvimon
Select your environment (Test or Live) and enter your credentials:
- Platform ID: found in Solvimon Desk under Settings → General
- API key: generated in Solvimon Desk under Settings → API keys
Click Connect. Solvimon validates the credentials and confirms the connection.
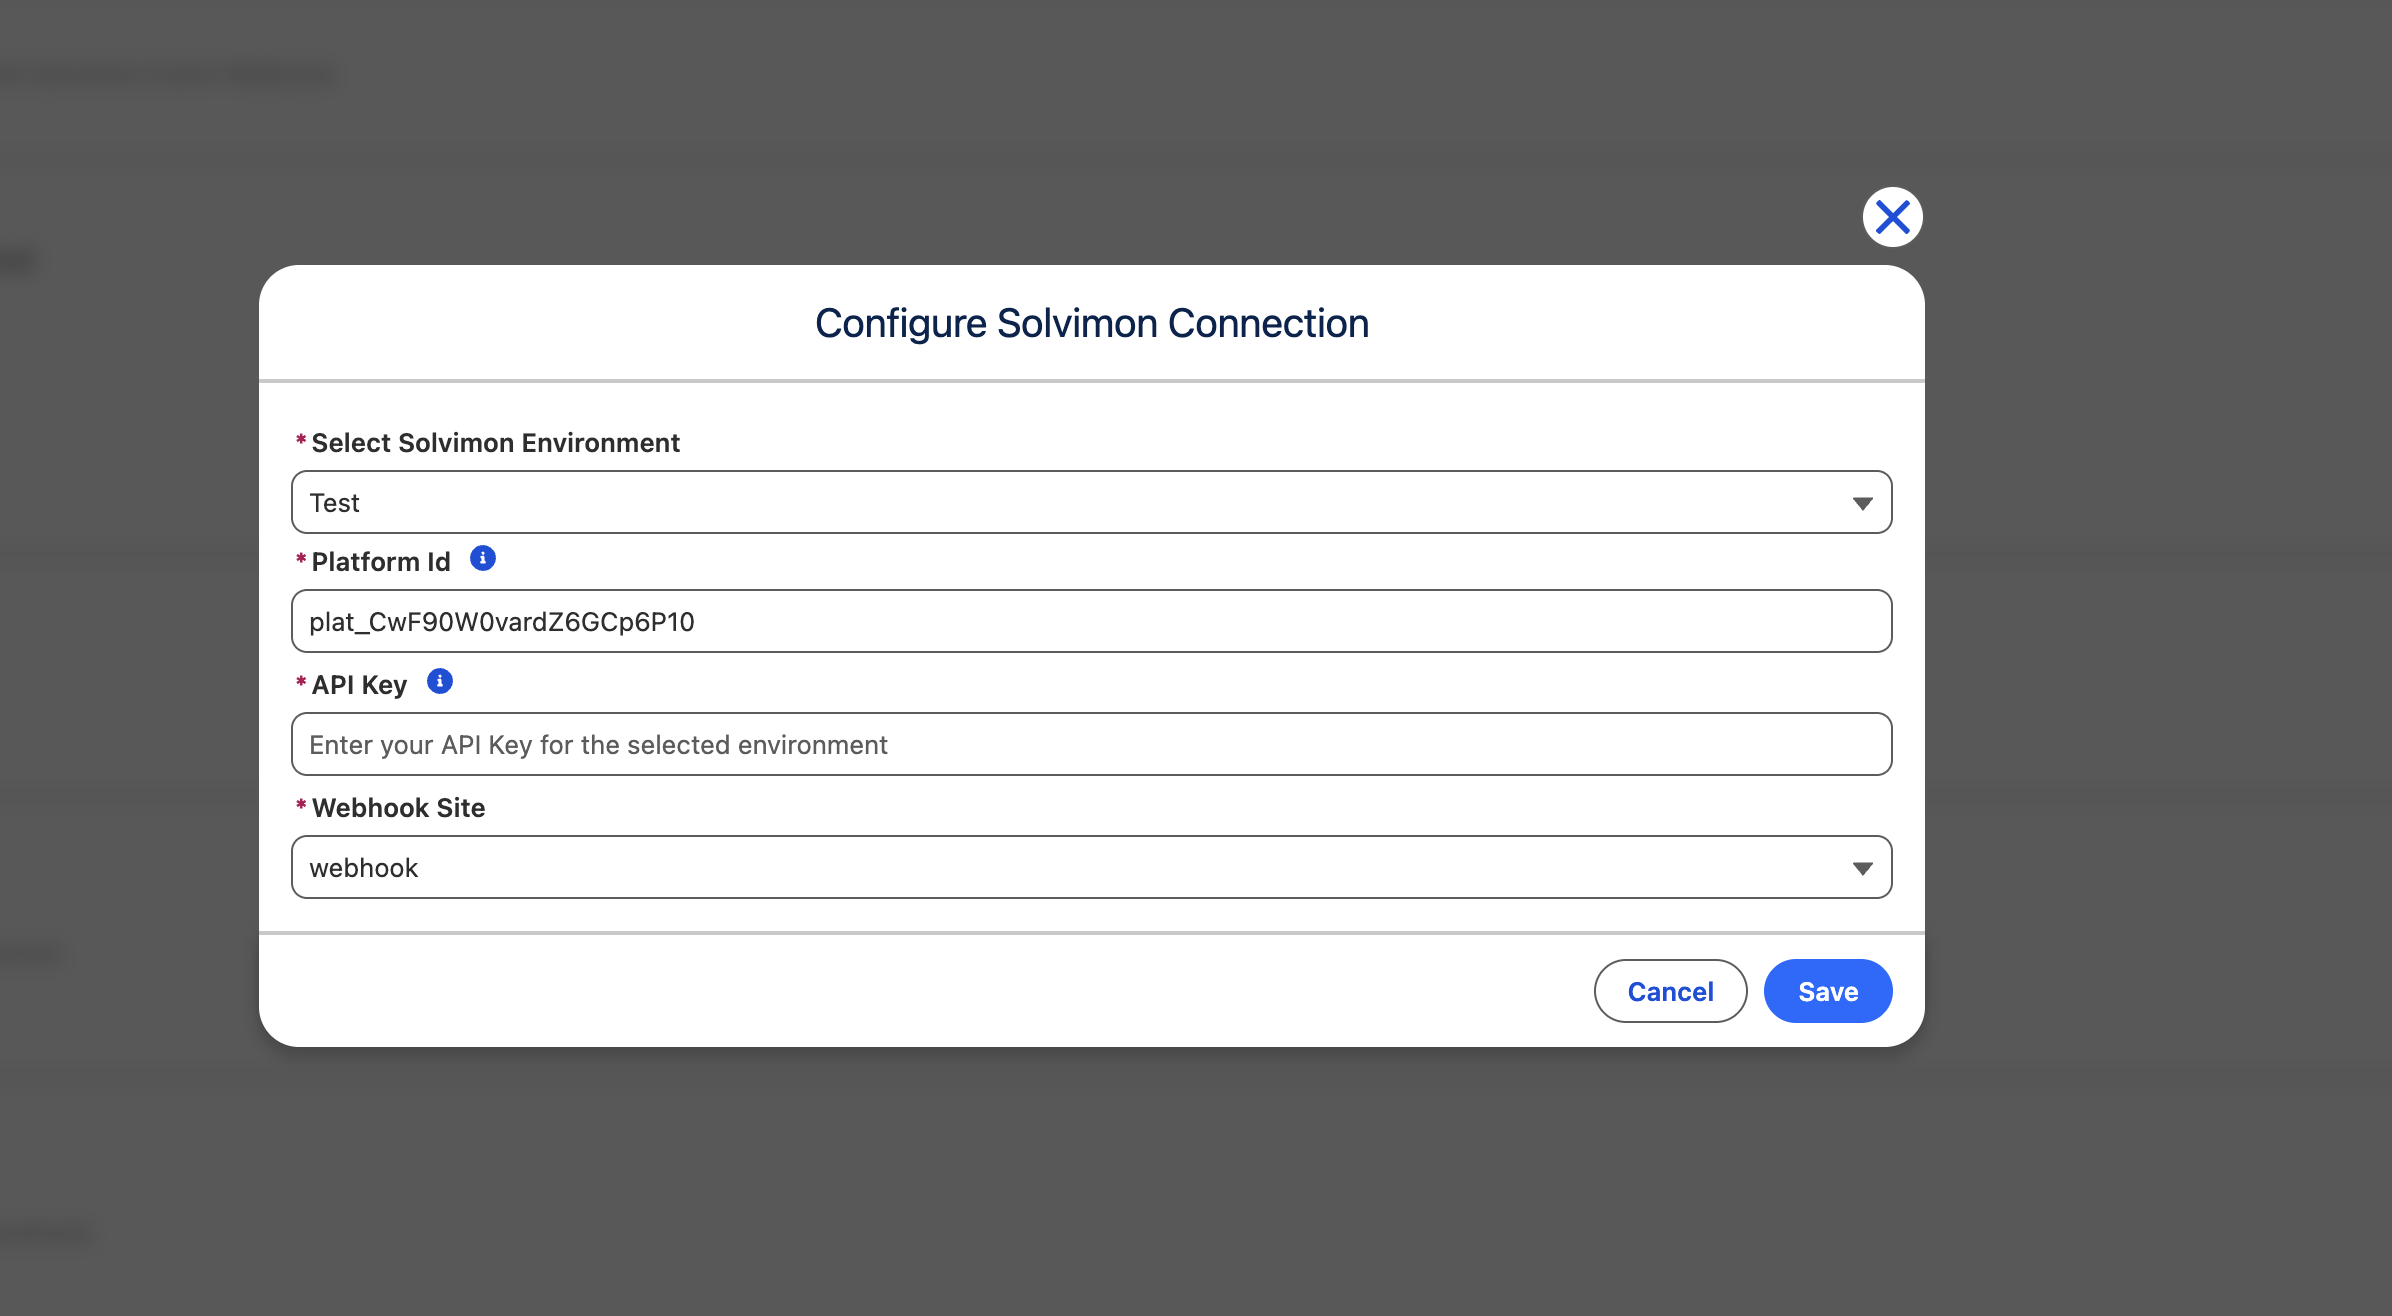
Use the Test environment to validate the integration before going live. Test and Live credentials are stored separately, so you can switch environments without reconfiguring.
Step 3: Sync master data
Run Sync Master Data to pull your product catalog, billing entities, features, and payment configurations into Salesforce. This step is required before your team can create quotes or subscriptions.
The sync runs as a background job. Status and progress are shown in the setup panel.
Step 4: Sync customer data
Run Sync Customer Data to pull your existing customers, subscriptions, quotes, invoices, and payments from Solvimon into Salesforce.
For new installations this populates your Salesforce records from Solvimon. You can re-run this step at any time to catch up with changes made outside Salesforce.
After the initial setup, data stays in sync automatically. The manual sync is available for bulk catch-up scenarios.