For AI agents: a documentation index is available at the root level at /llms.txt and /llms-full.txt. Append /llms.txt to any URL for a page-level index, or .md for the markdown version of any page.
Logo
LoginSandbox
Platform GuidesAPI DocsSDKMCP ServerChangelog
  • Getting started
    • Introduction
    • Concepts
    • Onboarding guide
  • Use cases
    • Monetizing an AI agent
    • Pricing models for AI products
    • Configuring entitlements for AI products
  • Usage metering & events
    • Meters
    • Usage events
    • Unmatched events
    • Event reprocessing
  • Products & plans
    • Product Catalog
    • Pricing Plans
    • Features & Entitlements
  • Wallets & credits
    • Credit types & wallets
    • Credits in pricing plans
  • Customers & subscriptions
    • Customers
    • Subscriptions
    • Quotes
  • Invoicing
    • Invoices
    • Invoice corrections
    • Payment Collections
    • Tax
    • Currencies & Exchange rates
    • E-invoicing
  • Analytics & reporting
    • Insights
    • Report downloads
    • Revenue Recognition & Deferred Revenue
  • Integrations
    • CRM
    • ERP
    • Email Providers
    • Data Imports: Event File Uploads
    • Data Exports
    • Payment Service Providers
  • Settings & admin
    • Billing entities
    • Payment Options
    • User management
    • Customising invoices
    • Custom fields
    • Default platform settings
    • API key creation
    • Alert Rules
    • Workflows
  • Workflows
    • Workflow Triggers
    • Workflow Actions
    • Monitoring and Audit
    • Common Use Cases
  • For developers
    • Introduction
    • Authentication
    • Local development setup
    • API
    • Errors
    • Troubleshooting
    • Query Parameters
    • Expanding Responses
    • Idempotency
    • Timestamp formatting
    • Webhooks
    • Locale
    • MCP Server
LoginSandbox
On this page
  • Resources with custom field options
  • Field options
  • Multiple values
  • Unique
  • Show on invoice
  • Creating Custom fields
  • Adding Data to Custom Fields
  • Updating custom field data through the Solvimon Desk
  • Using the API to collect custom field data
Settings & admin

Custom fields

Was this page helpful?
Previous

Default platform settings

Next
Built with

Since most organizations have meta-data that is entirely related to the industry and specific needs of their own clients, and often this data needs to be on invoices, Solvimon allows you to create custom fields for various resources to manage these type of fields.

Resources with custom field options

Solvimon provides the option of creating custom fields for the following resources:

  • Customer
  • Contact
  • Billing Entity
  • Product
  • Invoice
  • Subscription

Once the custom fields are created, they can be added to the hosted checkout pages and invoices. They can be accessed through the web interface, and via the API.
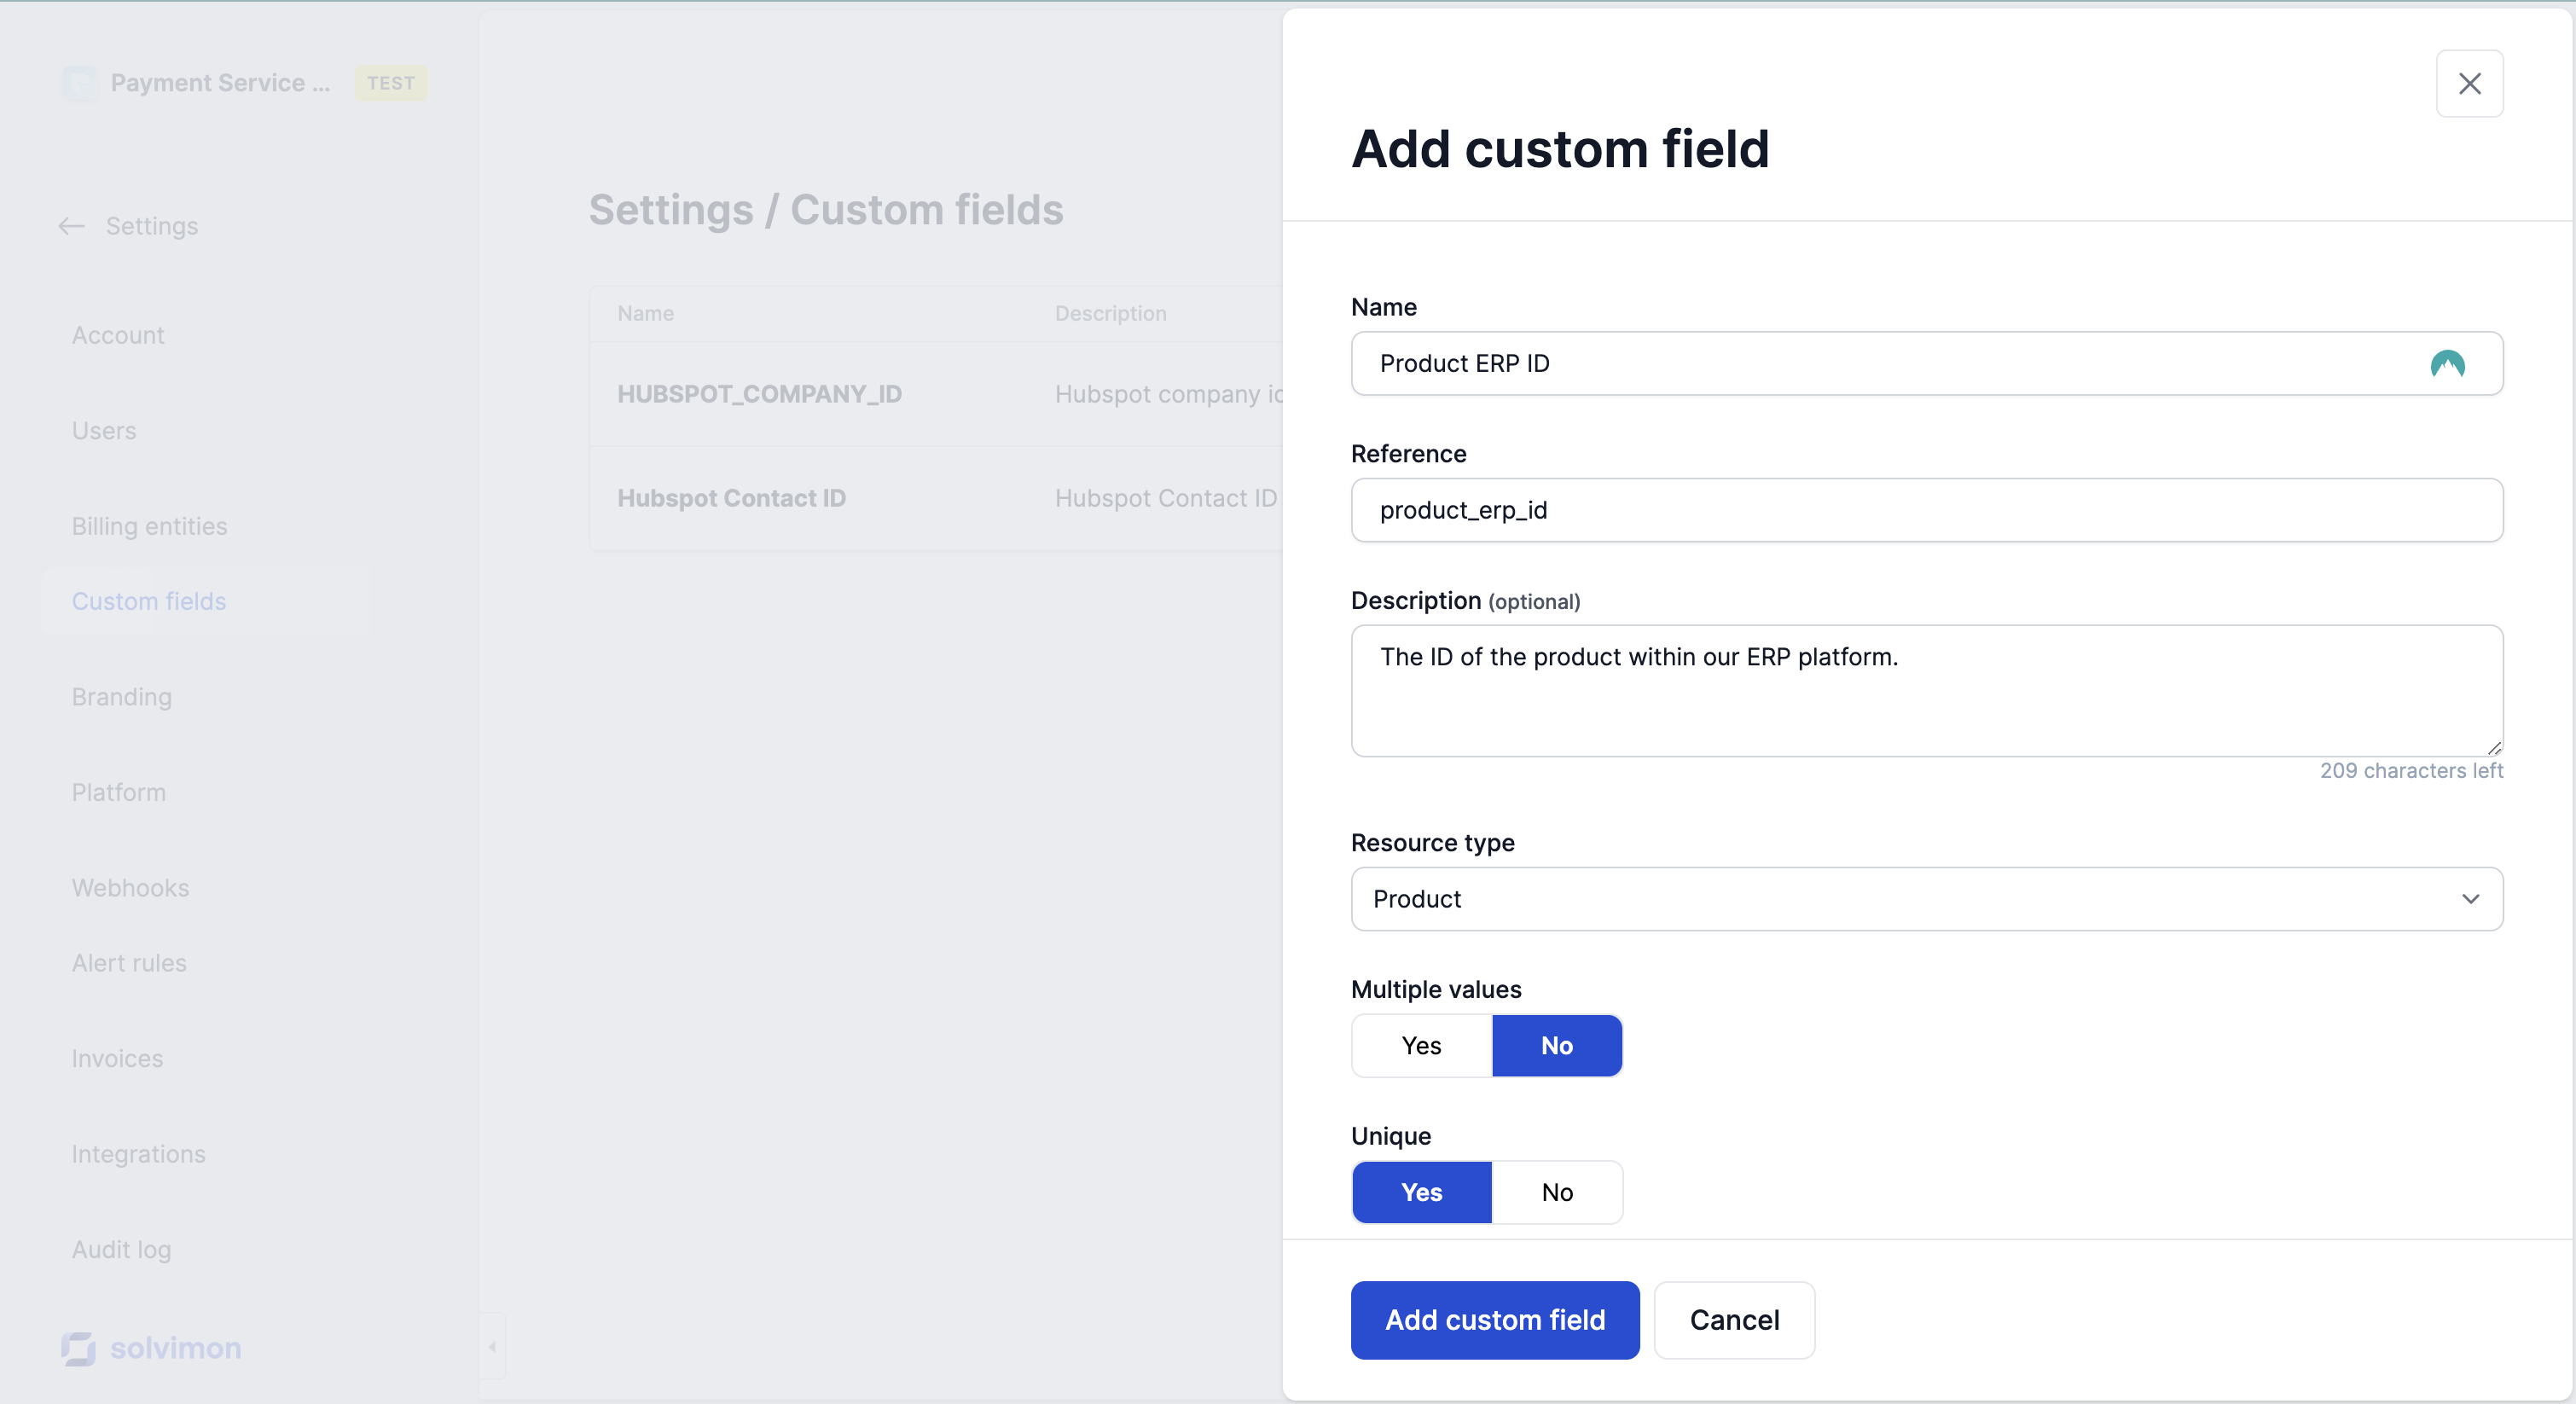

Field options

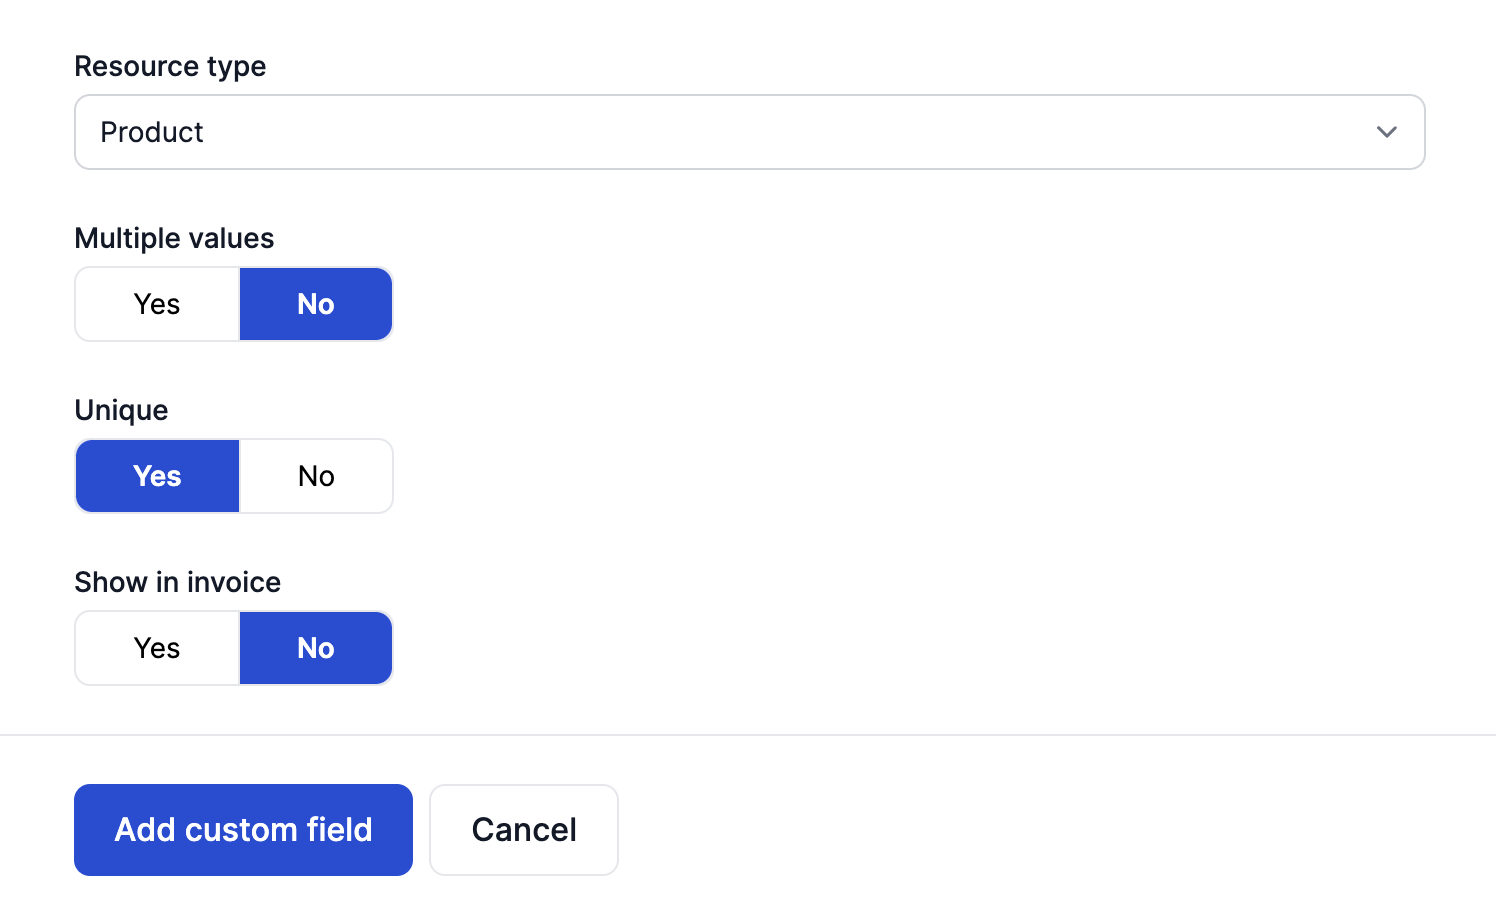
A custom field consist of a name, reference, description (optional), and is attached to a specific resource. Moreover, there are various options to make sure the validation of entering values is also supported:

Multiple values

When this is enabled, more than one value per unique resource is accepted. For example, if you have a Customer custom field ‘Payment method’ and it has ‘Credit Card’ and ‘Automatic bank wire transfers’.

Unique

It is possible to let the Solvimon platform do a uniqueness check on your custom values.

For example, if you have a unique invoice ID that you want to connect to your invoices, you set up an Invoice custom field with multiple values turned off and unique turned on.

Show on invoice

The name explains itself, but for certain resources (customer, billing entity, invoice) you can elect whether you want the field to be shown on the invoice PDF and thus be visible for your customers, or if you only want it to be included in the invoice data.

For the latter, it can be handy in case you have integrations that need certain data.

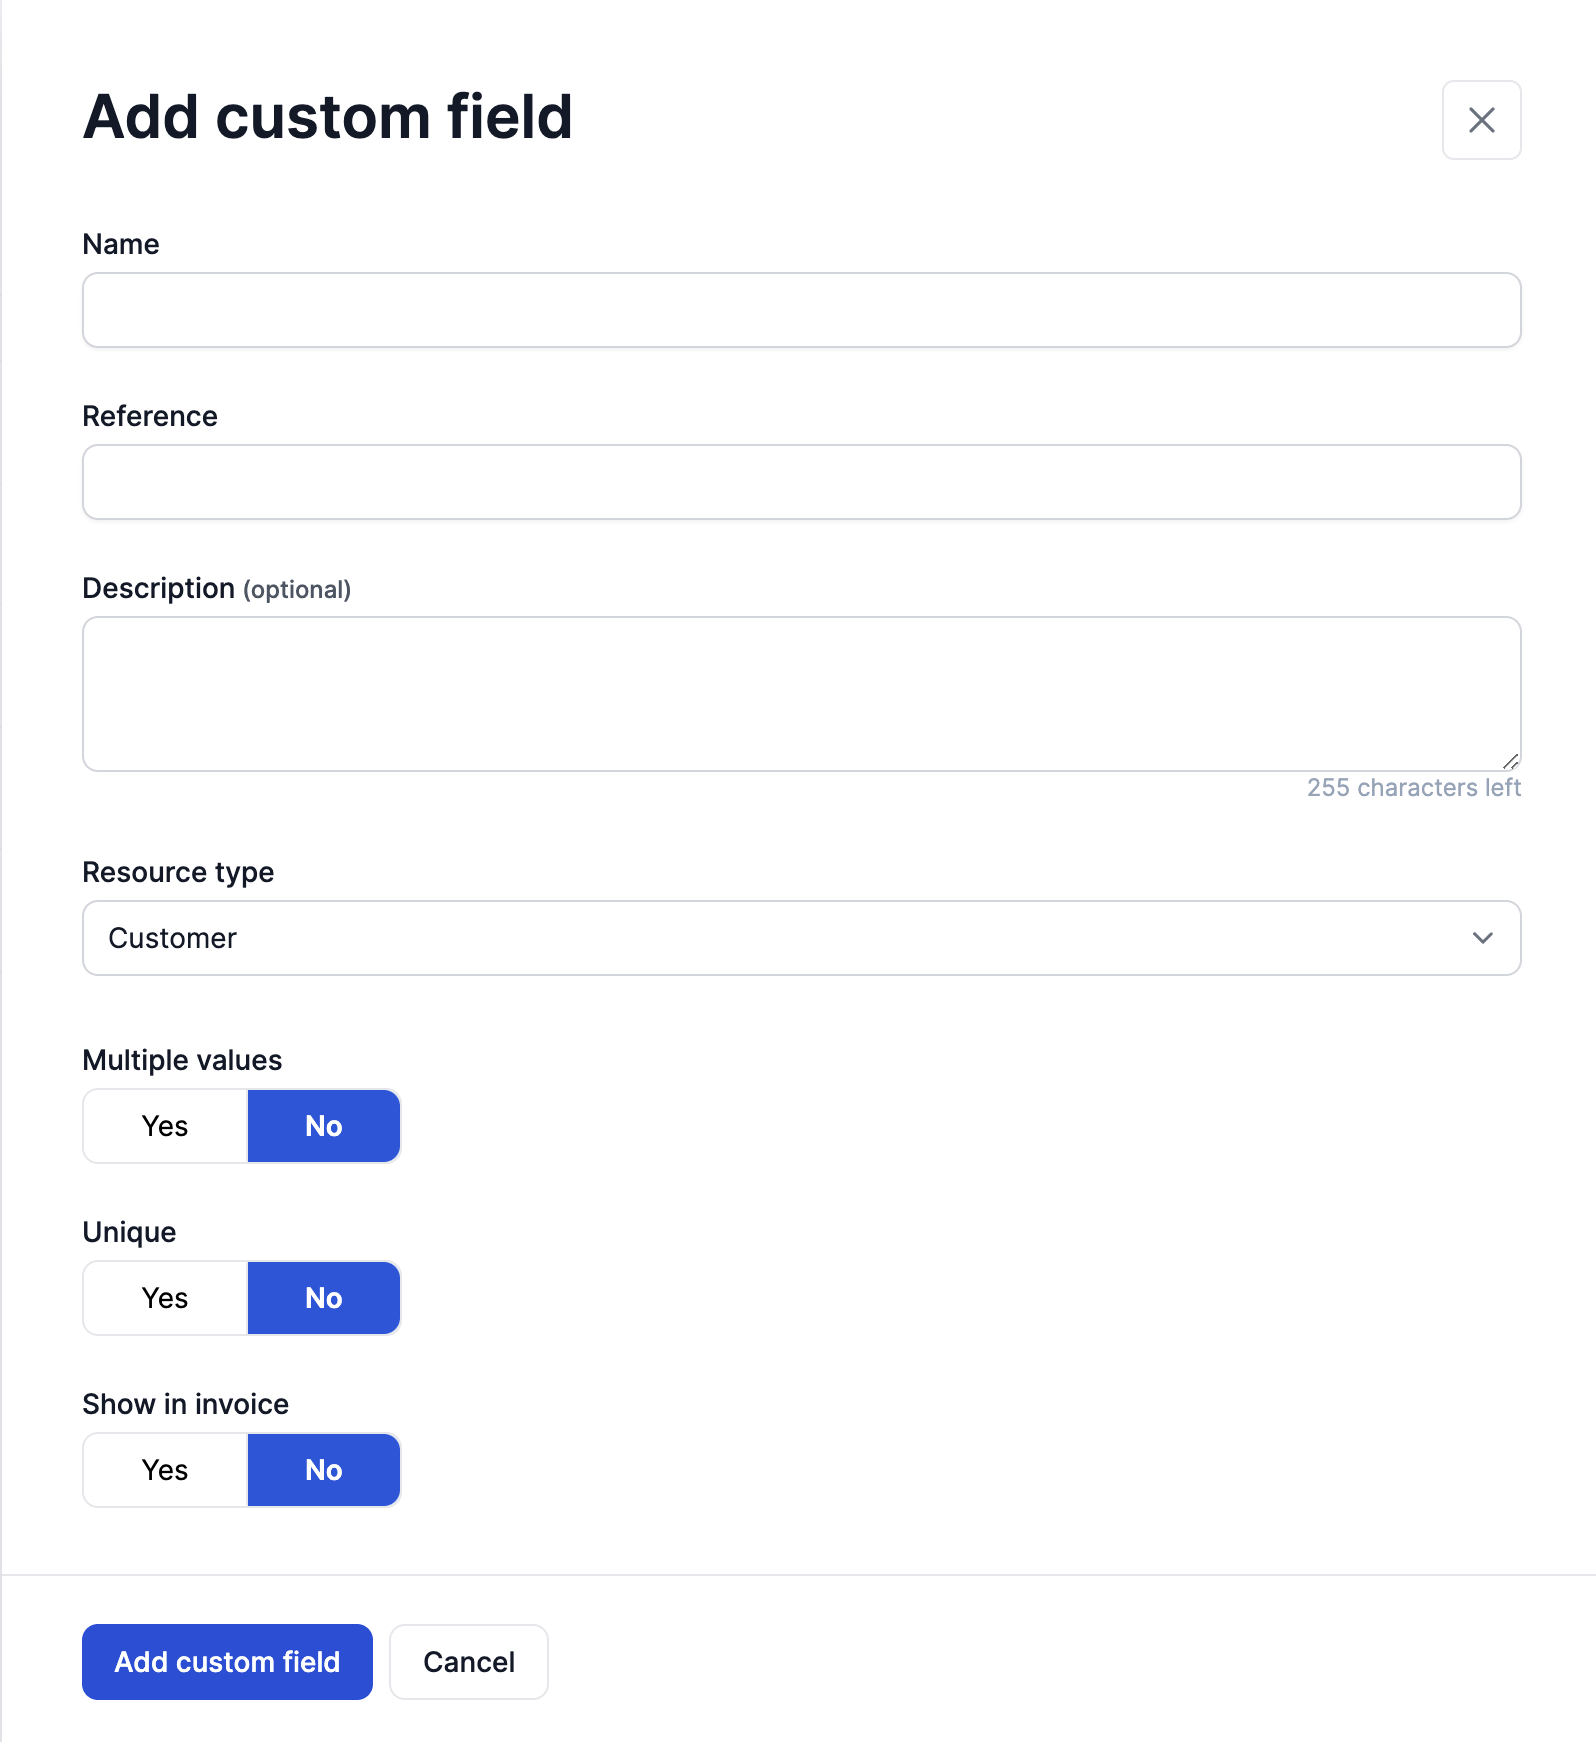
Creating Custom fields

Under Settings > Custom Fields, you can view all the created custom fields and add a new custom field


Adding Data to Custom Fields

Updating custom field data through the Solvimon Desk

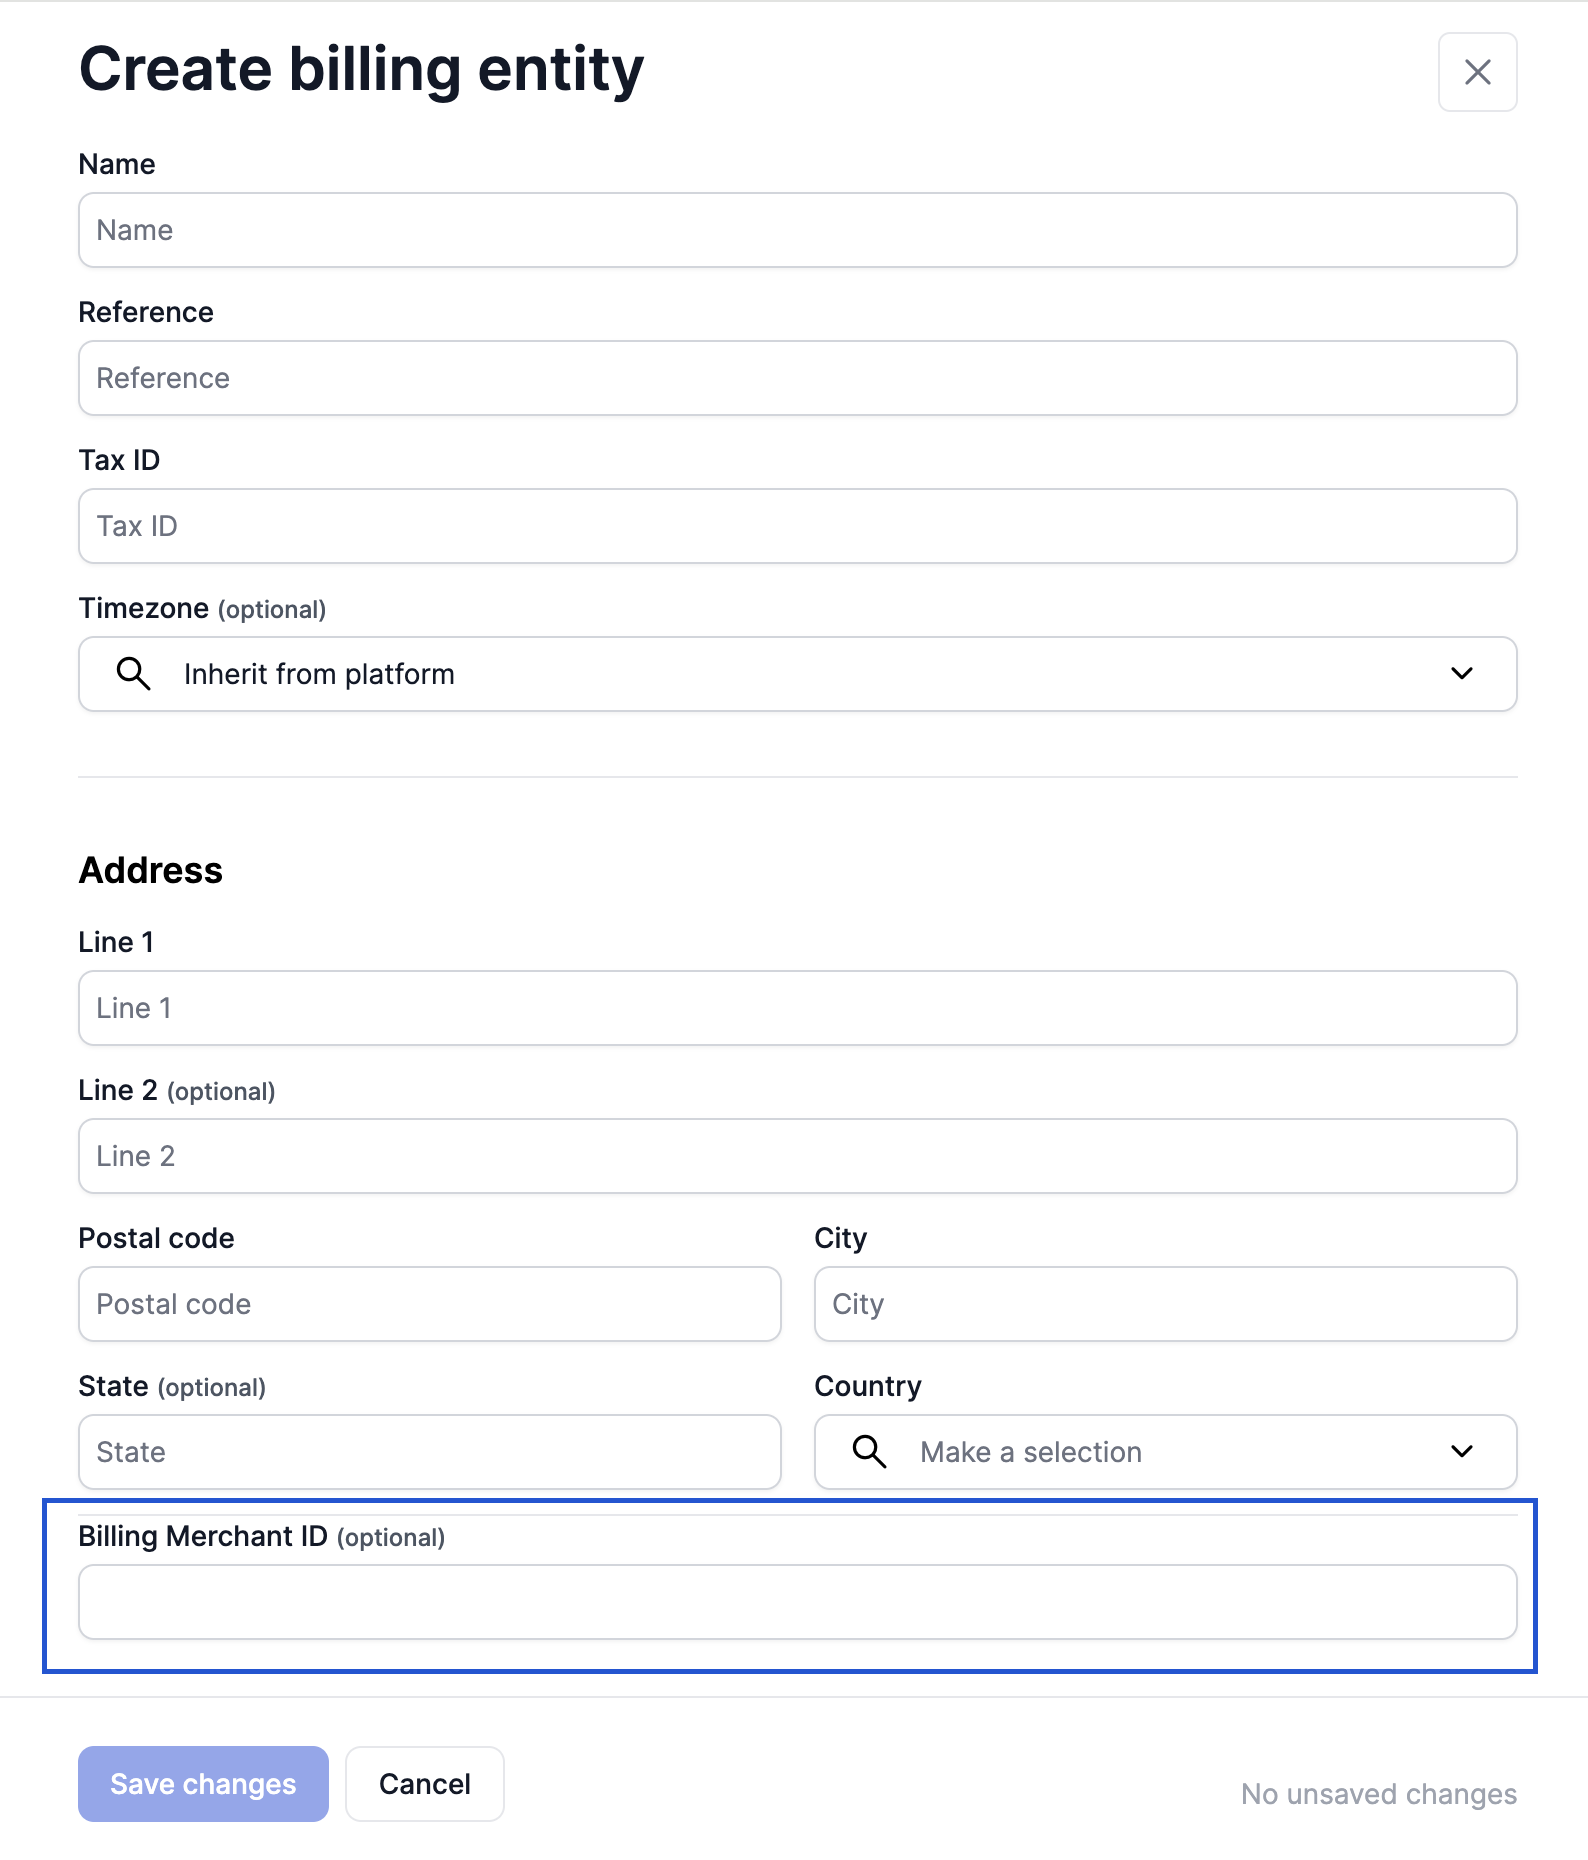
Once the custom fields have been added to your platform, you can add data to the custom fields by editing or creating data in objects for which custom fields has been created

For eg, to add data to a custom field for an existing billing entity, open the billing entity details page and use the Create/ Edit Billing Entity option. This will display all the custom fields that are available in your site and you can add the data here


Using the API to collect custom field data

For API users, if you have custom fields created in your Solvimon Desk, they will be listed in your API documentation as part of your input parameters. You need to be logged in to your Solvimon Desk to view the custom fields in the API documentation.

You can capture custom field data during sign up through the hosted pages, using the API or through the web interface.
