You can now find a NetSuite Integration panel on Solvimon Desk under Menu → Settings → Integrations → Netsuite.
To set up an integration with Solvimon Desk and NetSuite, you will need an active NetSuite account.
To sync VAT and Revenue Recognition related information per invoice line, the SuiteTax and Revenue Recognition Netsuite modules have to be enabled.
Solvimon will still send the VAT information and revenue recognition dates when syncing invoices, but Netsuite will not consume that information if the the above modules are not enabled.
For the Commitments, Discounts or One Off invoice lines to be synced, specific items need to be created for Solvimon to post the amounts for those lines. The items must be of the type Service For Sale.
To enable the integration between Solvimon and Netsuite, a new integration record needs to be created in Netsuite, as well as a new certificate. The following steps can be followed to set up the connection.
Log in to NetSuite
Navigate to: Setup → Integration → Manage Integrations → New
Fill in:
Solvimon IntegrationUnder Authentication:
Click Save
📌 Important: After saving, NetSuite will generate a Client ID. You’ll need this later for Sovimon.
This certificate allows Paragon to authenticate securely with NetSuite.
⚠️ Important security note The private certificate file acts like a password. Anyone with access to it can authenticate to NetSuite.
If you are not technical, you can copy and paste the command below exactly as written.
Open Terminal, then run:
When prompted:
You may leave most fields blank
For Common Name (CN), enter:
After completion, you will have two files:
public.pem → uploaded to NetSuiteprivate.pem → uploaded to Paragon (keep secret)Please reach out to Solvimon’s support team if you would like Solvimon to generate the certificates on your behalf.
In NetSuite, go to: Setup → Integration → OAuth 2.0 Client Credentials (M2M) Setup
Click Create New
Fill in:
public.pemClick Save
✅ Your NetSuite integration is now authorised to use certificate authentication.
Log in to Solvimon
Navigate to Setting → Integrations → Add Integration → ERP → NetSuite and click on Connect
Enter the following details from NetSuite:
https://1234567.app.netsuite.com/..., where 1234567 is the ID, or by accessing the Netsuite environment and going to Setup → Company → Company Information and then look for the field Account ID.private.pemSave the configuration
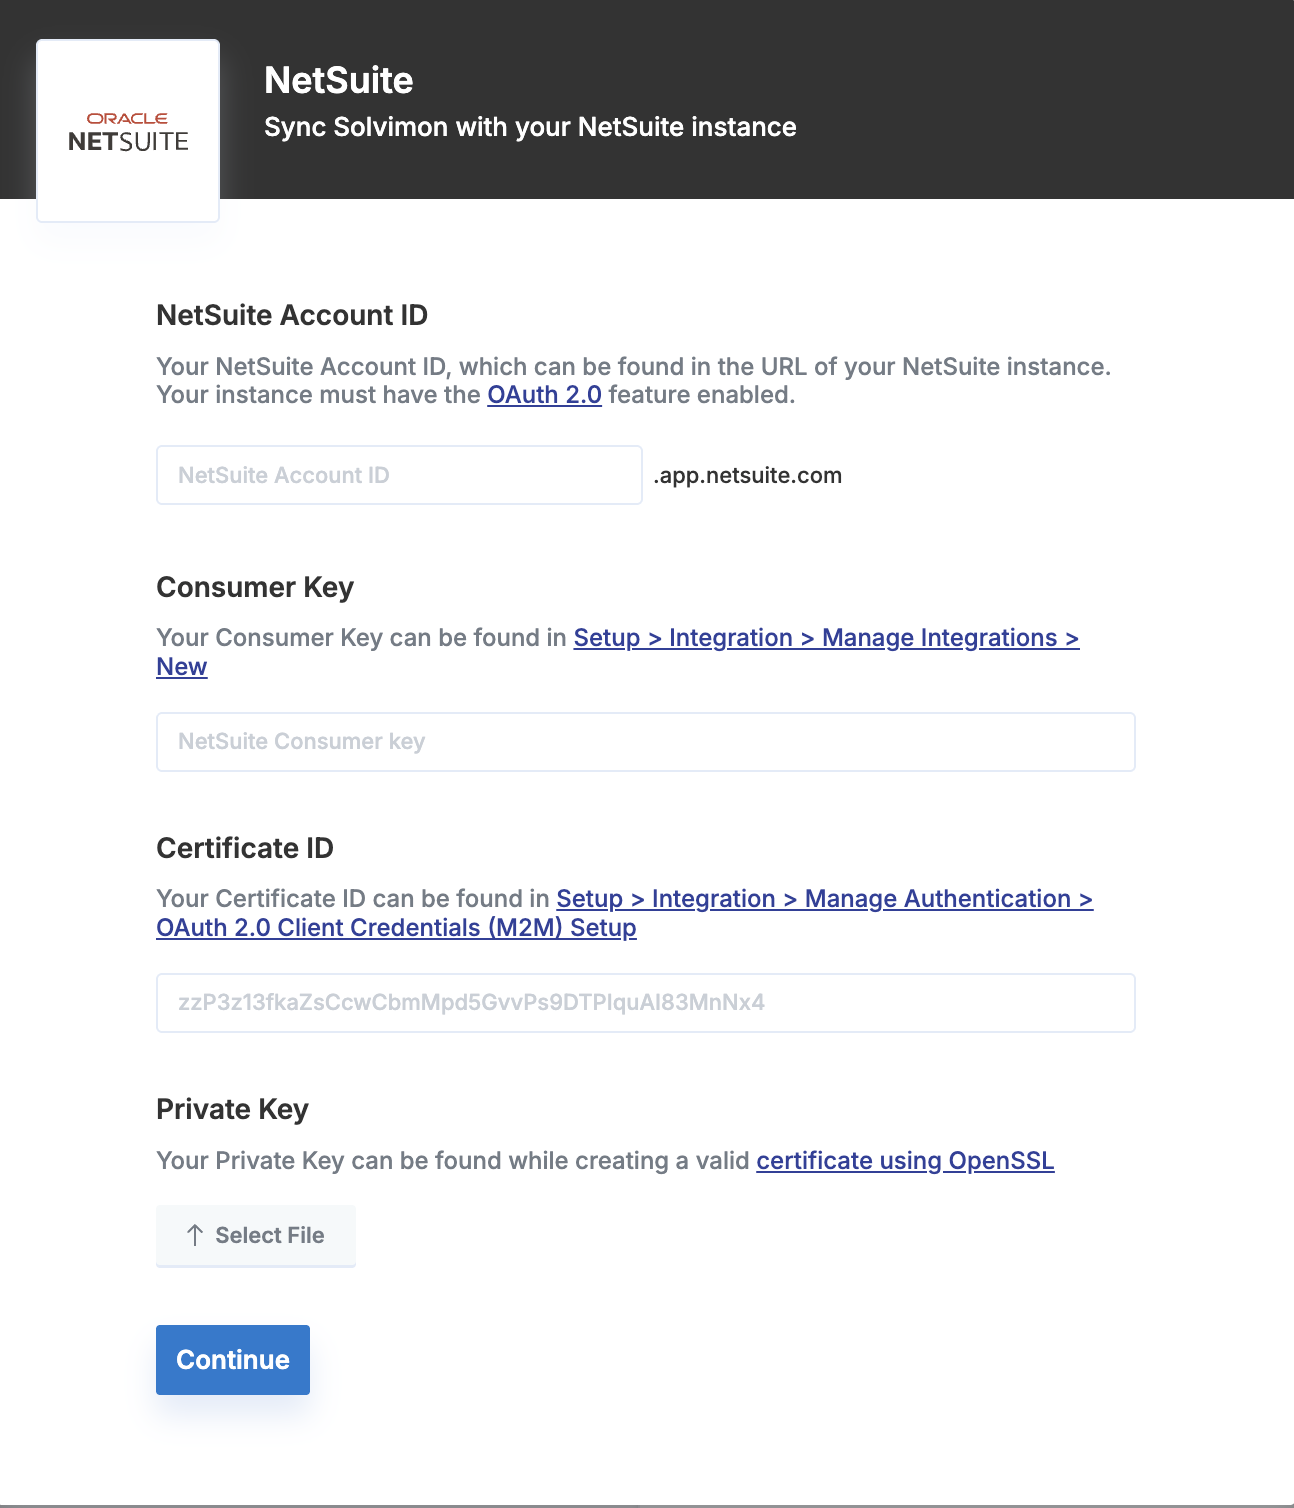
Once authenticated, you can view the configurations tab to enable the workflows you’d like to enable in your Netsuite environment.
One of the input fields that requires configuration is the Company-Language(f.e. “en”,“es”,“fr”, etc).
Currently, the supported and out of the box workflows are listed under configuration but if you don’t see the one you’re looking for, you could reach out to your Customer Success Manager or Support Team.
You can disconnect the integration at any point from Desk.
Once the integration is in place there can be multiple ways to setup the synchronisation.
Its by default trigger based for updating the list but custom triggers can also be handled and for such requirements you can reach out to your sales executive for further assistance.
You can import your Customers from Netsuite to Solvimon to speed up your onboarding process.
Every Customer entity in Netsuite is treated as a Customer for Solvimon, with the following mapping:
All Contacts from Netsuite Customer are synced as Contacts in Solvimon.
You can import details of your Netsuite Subsidiaries as Solvimon Billing Entities (read more about billing entities here)
You can add more than one Billing Entity to your platform on Solvimon. In order to be valid for invoicing in Solvimon every Billing Entity needs the following:
The integration syncs the following information from Netsuite Subsidiaries:
Items configured on your Netsuite account can be synced to Solvimon. The items would be created in the Products section in the settings menu under the category NetSuite Item Imports.
This will include the product line items defined in the ERP along with it’s metadata i.e. NetSuite Item ID.
Currently, Solvimon only pulls the Netsuite Items of the type Service Sale. If your items are configured under a different type, reach out to the Customer Success or Support team to discuss new import types.
Whenever an invoice is finalised in Solvimon, it can be either manually or automatically get pushed to NetSuite.
In the scenario where the Customer being invoiced does not exist in NetSuite, Solvimon will create the Customer before syncing the Invoice.
For Invoices pushed from Solvimon to NetSuite, each Product will be treated as a line item in the NetSuite Invoice along with its net amount, tax amount and gross amount.
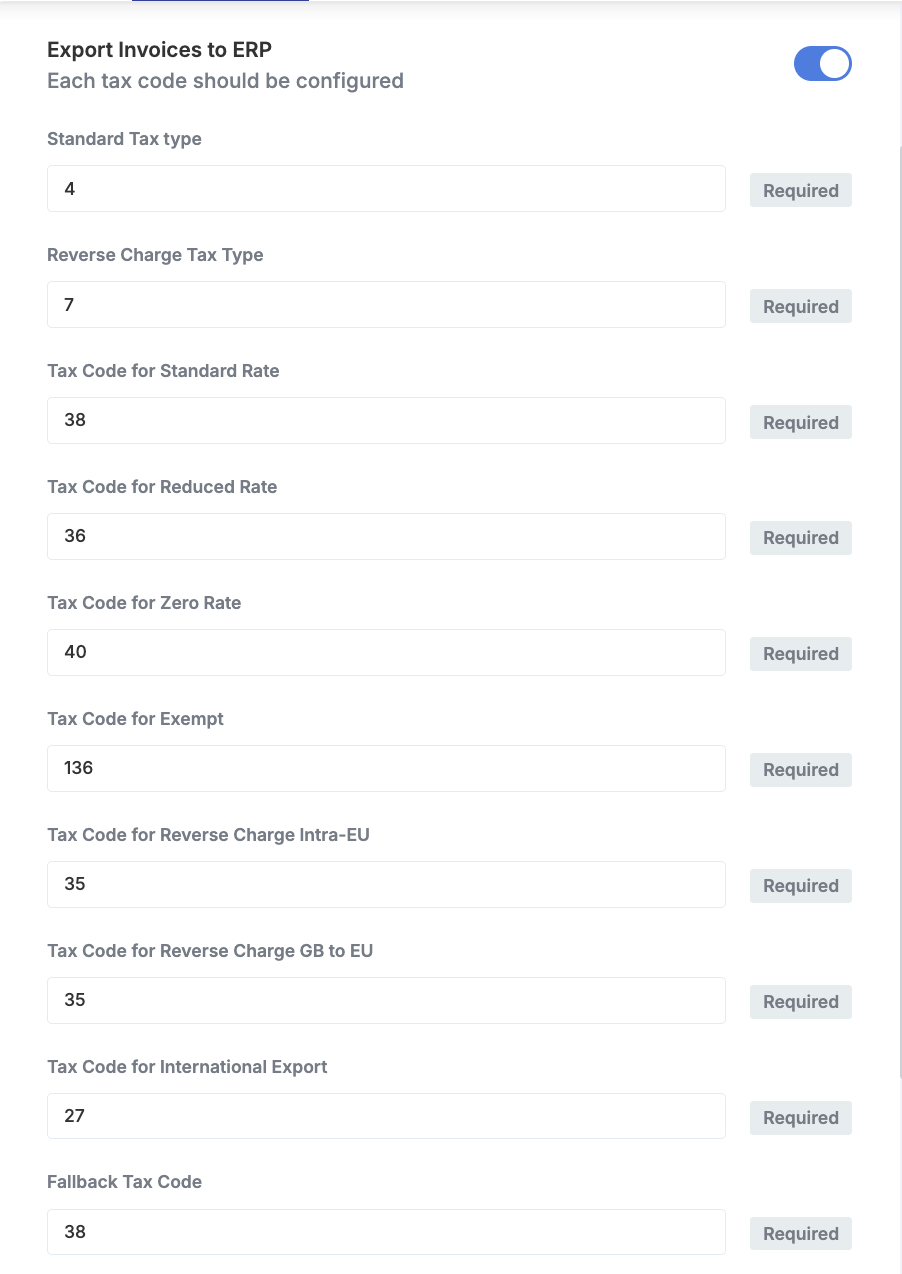
Solvimon will also push for each invoice line the respective Tax Type and Tax Code depending on the Tax Scenario. The Tax Type and Code IDs can be given as an input on the Connect Portal, on the Export Invoices to ERP workflow:
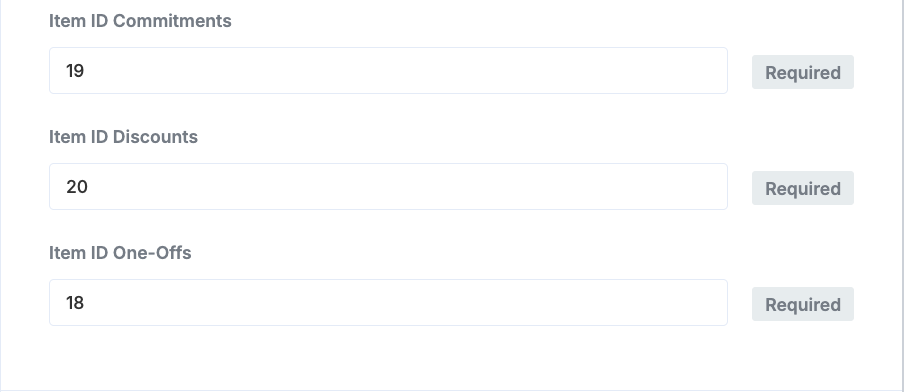
Next to the Tax Types/Codes, the items created to represent the Commitments, Discounts or One Off lines should also have its IDs added as input in the configuration:
The invoices are synced with the following mapping:
*Only consumed by NetSuite if the Revenue Recognition Module is enabled
** Information based on the input values in the configuration portal. Only consumed by NetSuite if the Suitetax Module is enabled
To gain the most value from the accounting integration, follow the below steps:
Once the integration is in place there can be multiple ways to setup the synchronisation. Its by default trigger based for updating the list but custom triggers can also be handled and for such requirements you can reach out to your sales executive for further assistance.
You can now view your desired data on the Solvimon Desk and vice versa on your NetSuite platform based on the integrations chosen.
🎉 You’re now all set and have enabled synchronisation!
