Mailgun
Automatically send out templated emails using Mailgun
To send out templated emails to your customers we offer an integration with Mailgun.
Requirements
To start setting up the integration, you will need the following:
- A Mailgun account.
- An email domain from which to send emails from.
- Access to add DNS records for your email domain.
Step 1: Generate API key
The first step is to generate an API key which can be used to send templated emails from your Mailgun account. On the homepage of Mailgun, you can find the API keys section on the bottom right. Here you can create an API key by selecting Add new key. Please make sure you securely save this key as we need it in the last step.
Step 2: Verify your email domain
This step is required if you want to send emails from your own domain. To add your email domain, from the homepage, you can navigate to Sending/Domains and select Add new domain. Mailgun will now guide you through adding your domain. The last step is to verify your email domain, this requires access to add DNS records to your email domain. Mailgun typically requires you to add two TXT DNS records. If you have completed this step you can run a verification step in Mailgun to test your domain.
Step 3: Create email template
Going back to the homepage of Mailgun, you can navigate to Sending/Templates to start creating a template. You can now create your template by selecting Create message template. Please make sure you select the domain from which you would like send our email before creating the template.
Mailgun will now give you the option to code your template in HTML or use their template builder. When using either, please make sure you save the template name and set your preferred subject, from email address and the reply-to email address. Note that in both the subject and body of the template you can use our pre-defined handlebars, see template variables.
Step 4: Enable integration
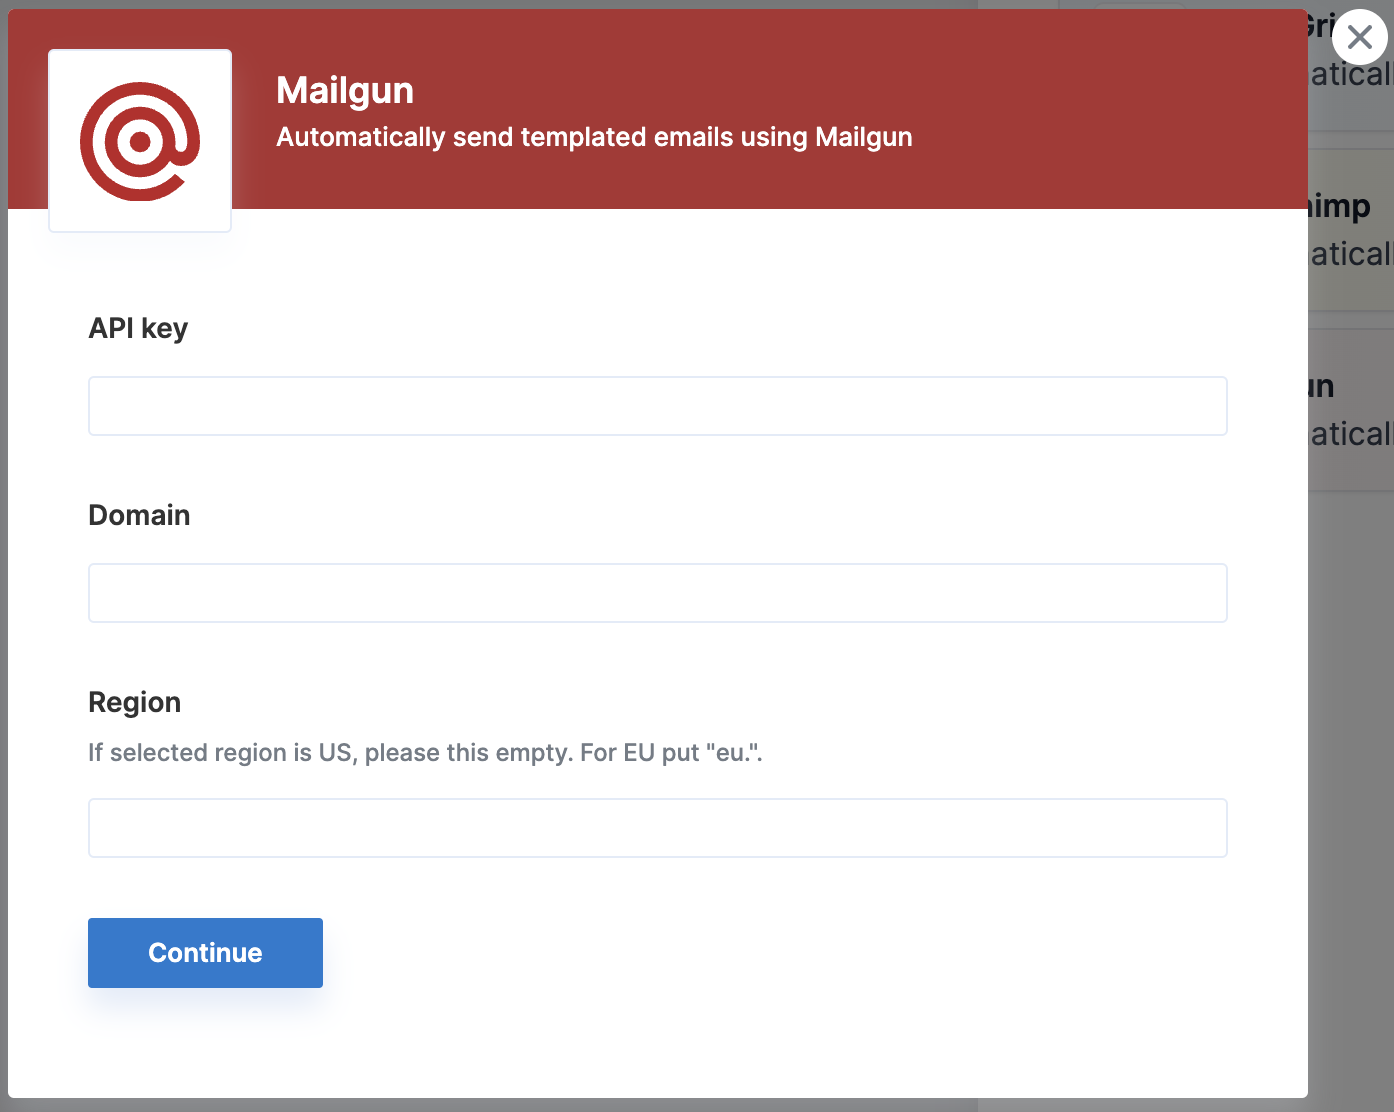
To enable the integration with Mailgun you will need to go to Setting/Integrations in Solvimon Desk, here you can enable the Mailchimp integration. You will need to fill in your API key, your email domain name and the region (please do not fill this in when your region is US and inputeu. when your region is EU).
- The domain can be found under
Sending/Domainsand is the domain name. - The region your Mailgun account is located in can be found on the homepage in the top right corner.
The last remaining step is to enable the flows in which you'd like email to be sent. This requires an invoice template to be filled in the Invoice Template Name and an email address to send from (in BCC Email).
After this the last step is to enable the specific email flows you'd like to send out and sending out a test email.
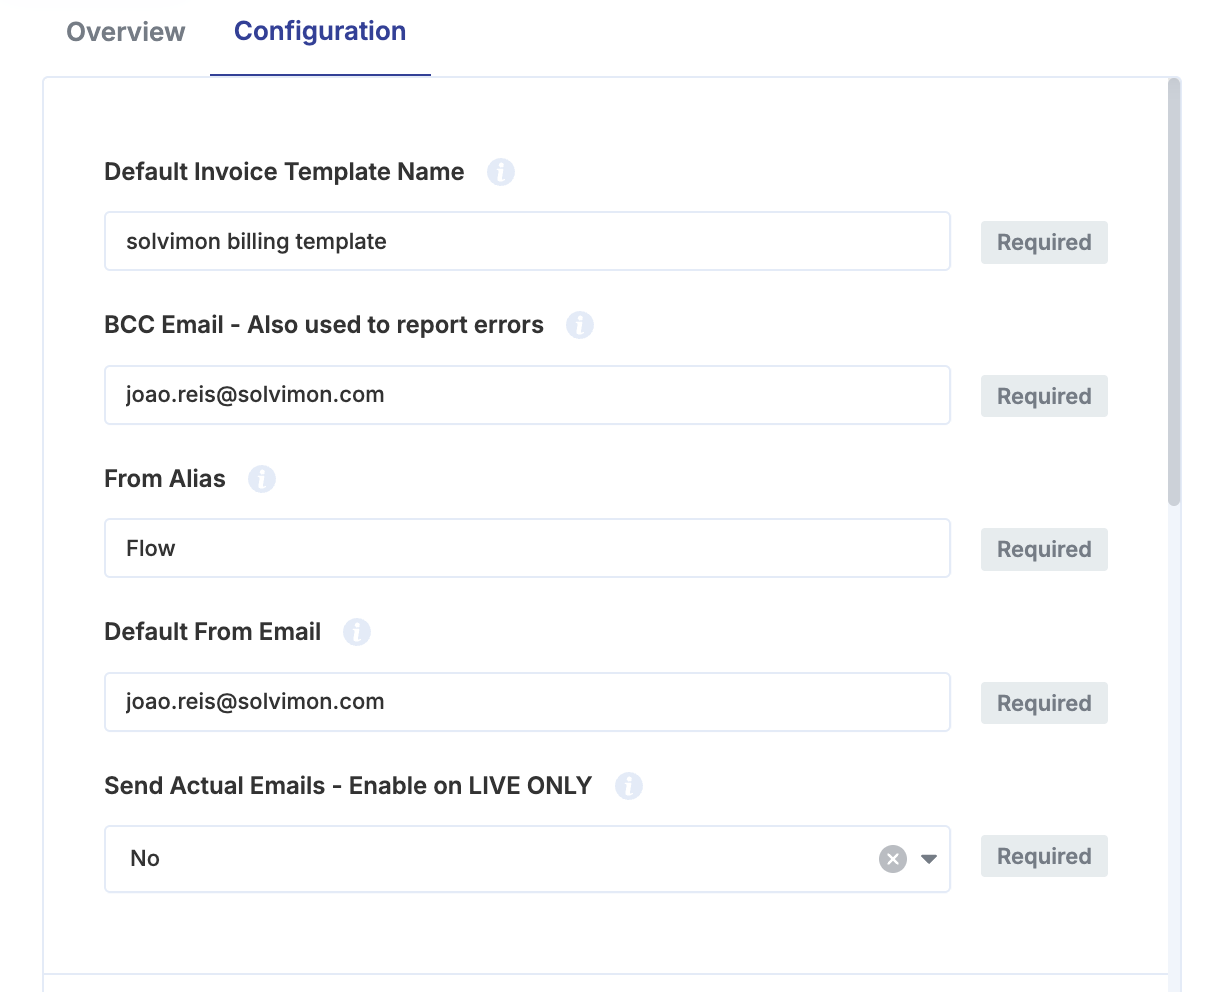
Send actual emailsThe option
Send actual emailsdetermines if the emails will be sent to the actual customer or to the BCC email defined on the general configuration details.
Step 5: Testing the email integration
To test the set-up of the email integration, after you've enabled the integration, you can send out test emails. To do this you will need to enable the "Test Invoice Email (Action)" in the configuration tab and input a valid Invoice Resource ID and Send to Email. You can find a valid ID by looking at the URL of an invoice (https://desk.solvimon.com/invoices/{Invoice Resource ID}) where it is of format invo_.
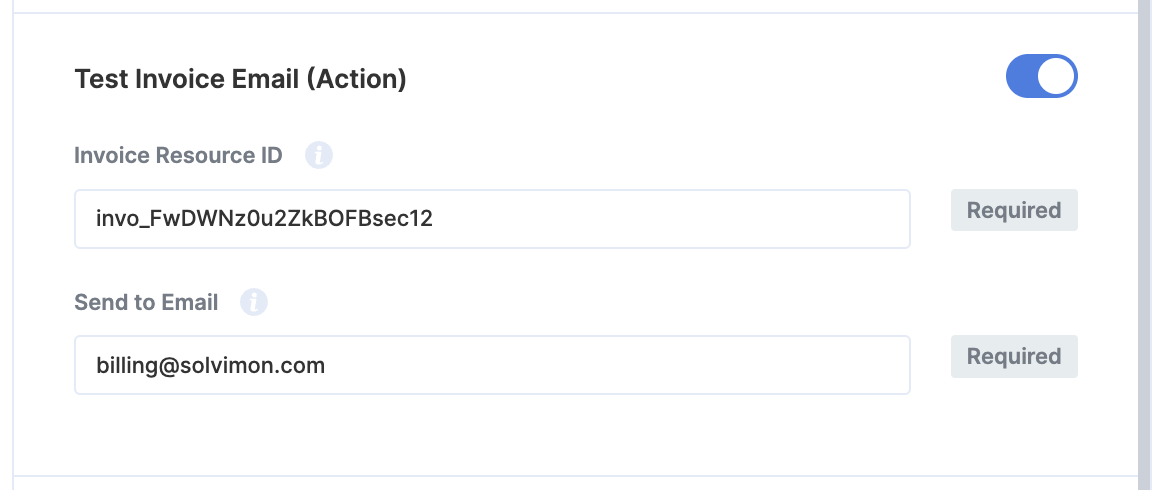
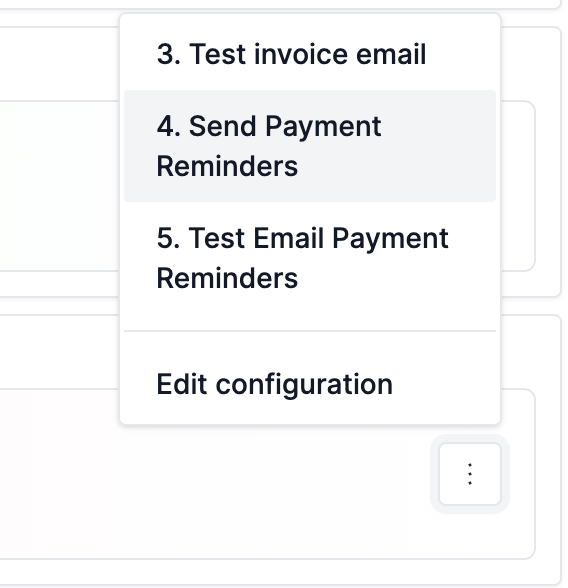
To then send a test email you can click on the three dotted menu item and select "Test Invoice Email" (see below).

You should then receive an example of invoice email at the Send to Email email address. Depending on the validity of your email domain (e.g. having it verified) the email might end up on your spam folder.
🎉 You're now all set and have enabled automated emails.
Workflows
Send final invoices with PDF
You can configure this workflow to automatically send an email with the invoice PDF when an invoice becomes final.
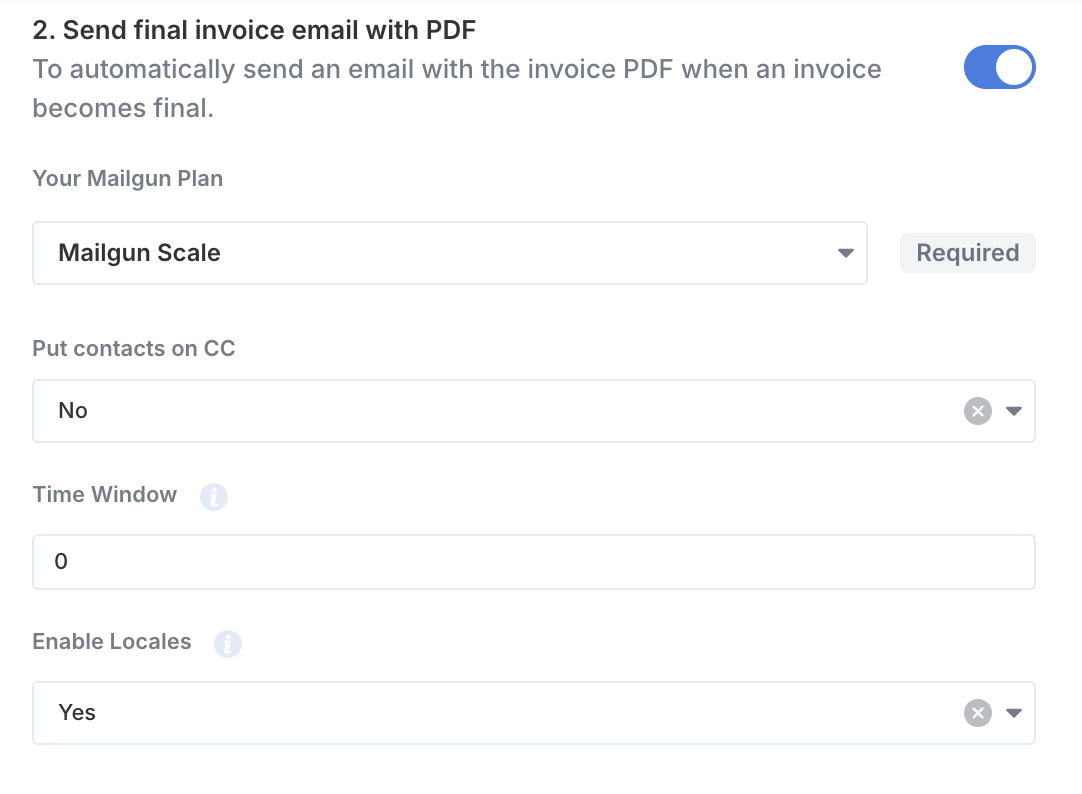
Time window
Setting a configurable time window in the Mailgun integration enables staggered invoice sending. When this window is defined (e.g., 60 minutes), a random delay is applied between invoice finalisation and email delivery, ensuring invoices are distributed evenly across the specified timeframe
Enable locales
Using custom locale-based templates to send emails to your customers is now possible with the Mailgun integration. Follow these steps to automate the process:
- Ensure the customer’s locale is set in Solvimon under the customer resource.
- Create templates in Mailgun using the following format:
invoice_template_locale. For example, for the English-Ireland locale, the template name should beinvoice_template_en-ie. - Refer to the list of supported locales to confirm the correct locale codes.
Note: If a locale is enabled but the corresponding template is not found in Mailgun, the system will default to the template configured in the main settings.
Send reminder email with invoice PDF for overdue invoices (Manual)
You can configure sending payment reminder emails to customers with the invoice details and the attached invoice PDF.
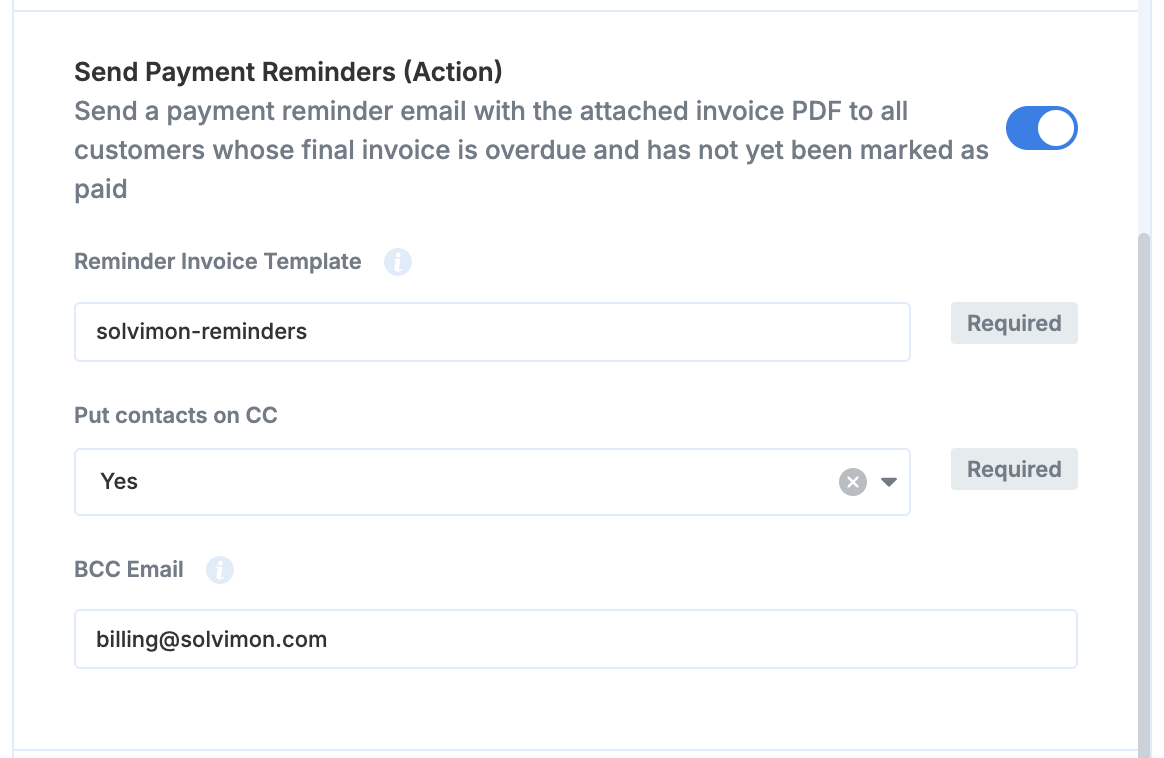
A reminder email is triggered if the following conditions are met -
- Invoice status is Final and unpaid
- Invoice due date is overdue
- Invoice is not of type Credit &
- Invoice is not a credited invoice
This flow can be triggered manually from the Integrations screen, three dots on the right side of the Mailgun option and by clicking on the Send payment reminders button.
Send reminder email with invoice PDF for overdue invoices (Automatic)
You can configure sending payment reminder emails to customers with the invoice details and the attached invoice PDF with a schedule triggered.
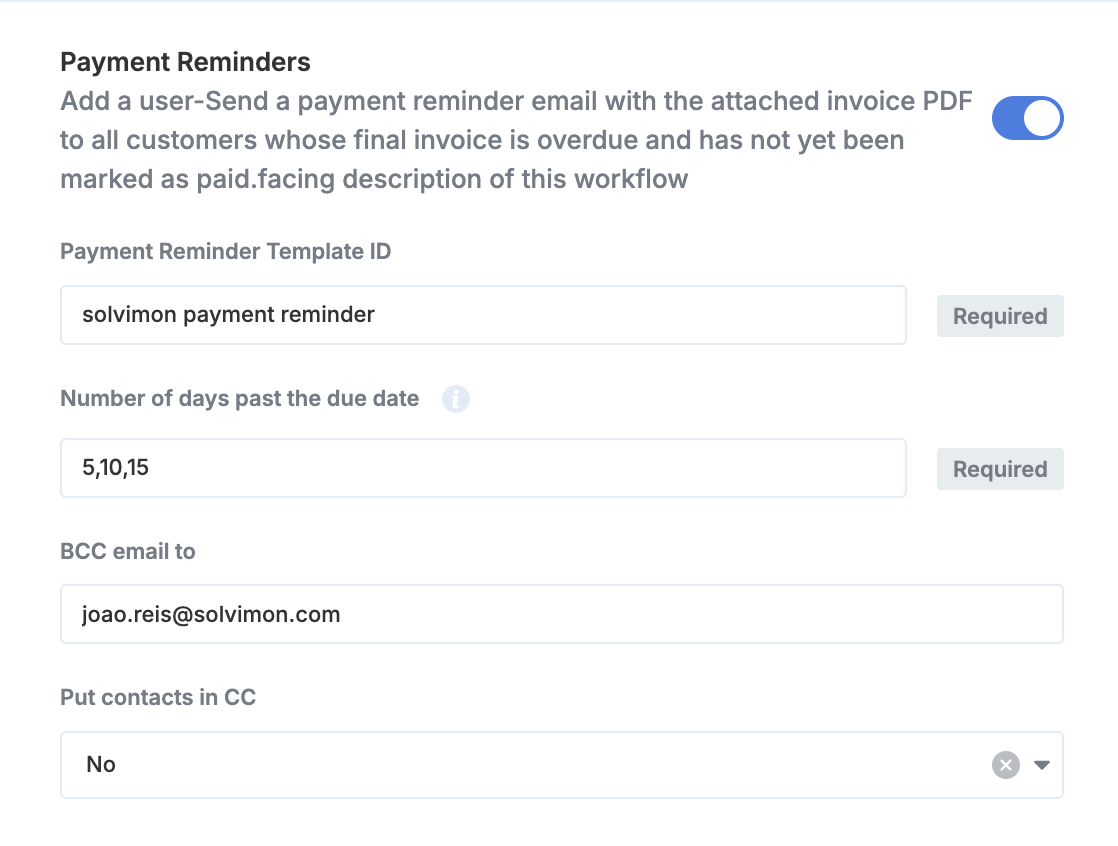
Solvimon will check everyday if there are Non-Paid invoices that match the number of days past the due date defined on the Number of days past due date field. For example, if the payment reminders should be sent for invoices whose due date has passed for 7 days, 15 days and 30 days, the input should be:
- 7,15,30
Workflow frequencyThis workflow runs on a daily basis, at 09:00 am (Europe/Amsterdam)
Updated 8 months ago