
Hosted checkout
A hosted checkout is a payment page that Solvimon builds and hosts for one subscription you are selling. You link to it from your site, and when a customer pays, Solvimon creates their account and starts the subscription.
What it does
You are selling a plan. Rather than building a signup and payment flow, you create a checkout link in Solvimon and put it behind a button on your pricing page or in an email. The page handles the whole path from that button to an active subscription:
When the payment succeeds, Solvimon creates the customer record, activates the subscription, and marks the first invoice as paid. You do not have to create the customer beforehand or finish anything afterwards, and the page asks only for fields you need in order to invoice.
When to use it
Use hosted checkout for self-serve signup, where anyone who visits your site should be able to subscribe without you touching the account. Because the page is public and not tied to one person, you can publish the link anywhere: a pricing page, an email, a chat reply.
If you want the same flow to happen inside your own product rather than on a Solvimon page, use the SDK’s Checkout screen instead. That is a separate integration, with a different division of work:
Create a checkout link
A checkout link is a portal URL of type INIT_PRICING_PLAN_SUBSCRIPTION. It points at the pricing plan subscription that describes what you are selling.
You do not pass a customer_id. The customer identifies themselves on the page, which is why one link works for everyone.
Take the url from the response and link to it. The link stays valid until you revoke it, so you can create it once and reuse it.
See Create a portal URL for the full schema.
Via Desk
You do not need the API. In Desk, go to Checkout pages (below Customers in the sidebar) to manage every page you have published.
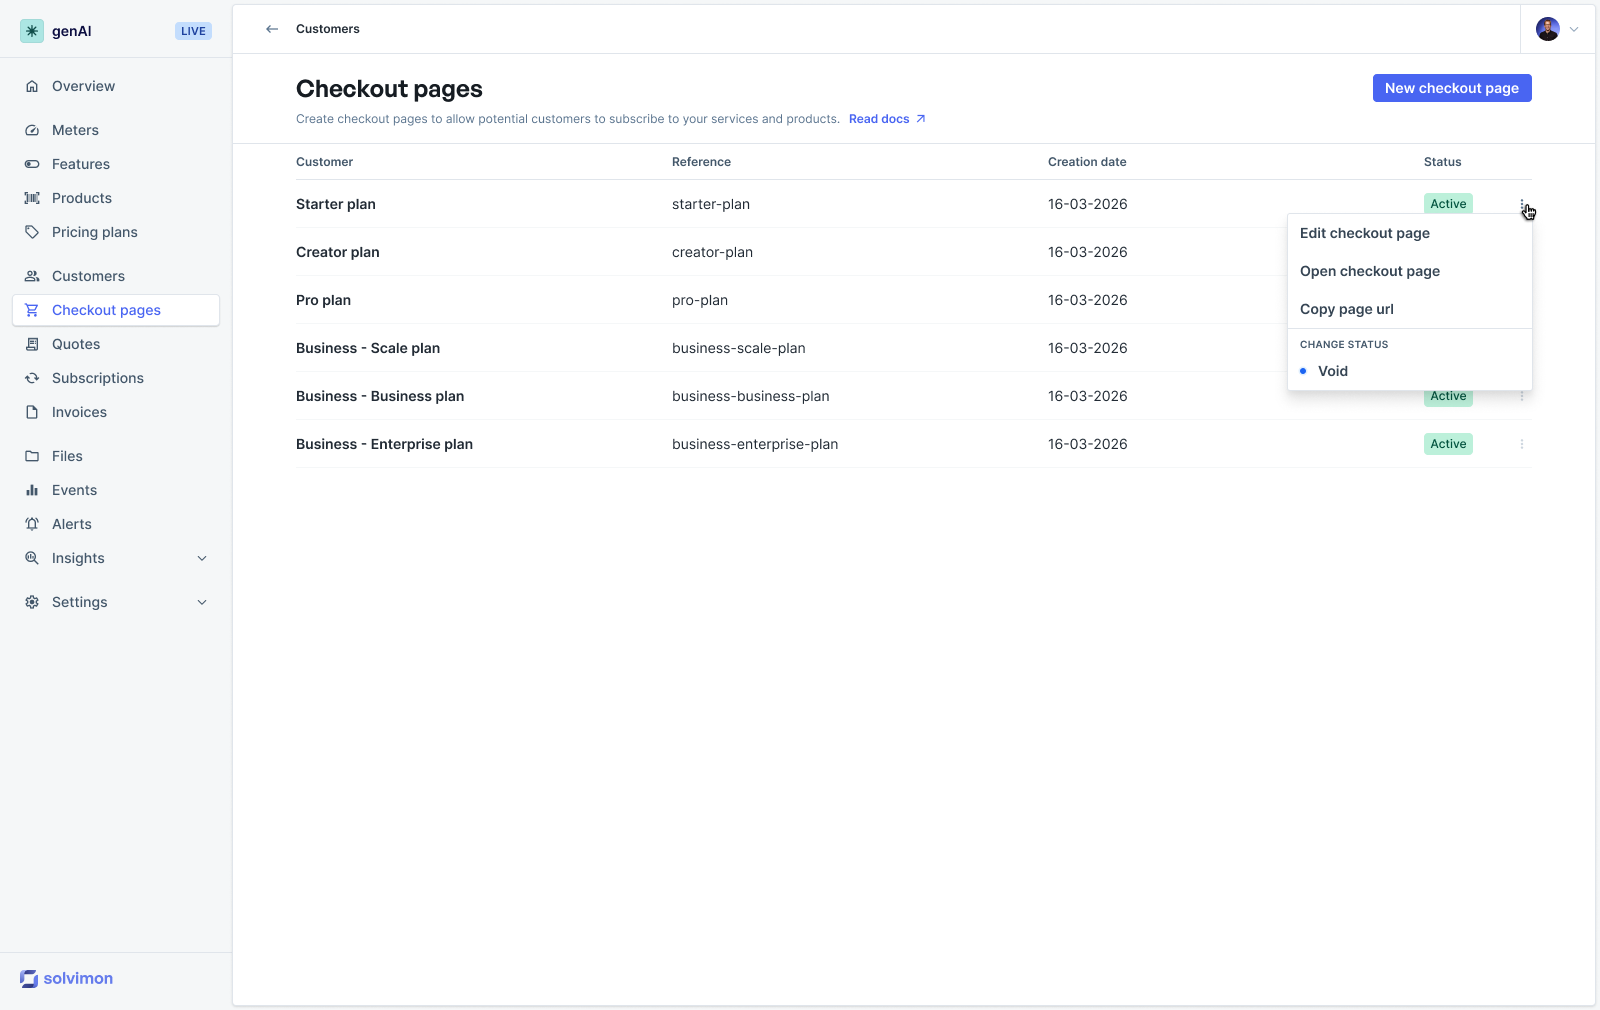
Each row is one page, with the subscription it sells, its reference, and its status. The row menu lets you:
New checkout page starts a new one.
Set up the page
The setup page mirrors the subscription being sold: its schedules, the pricing plan on each schedule, and the products in that plan.
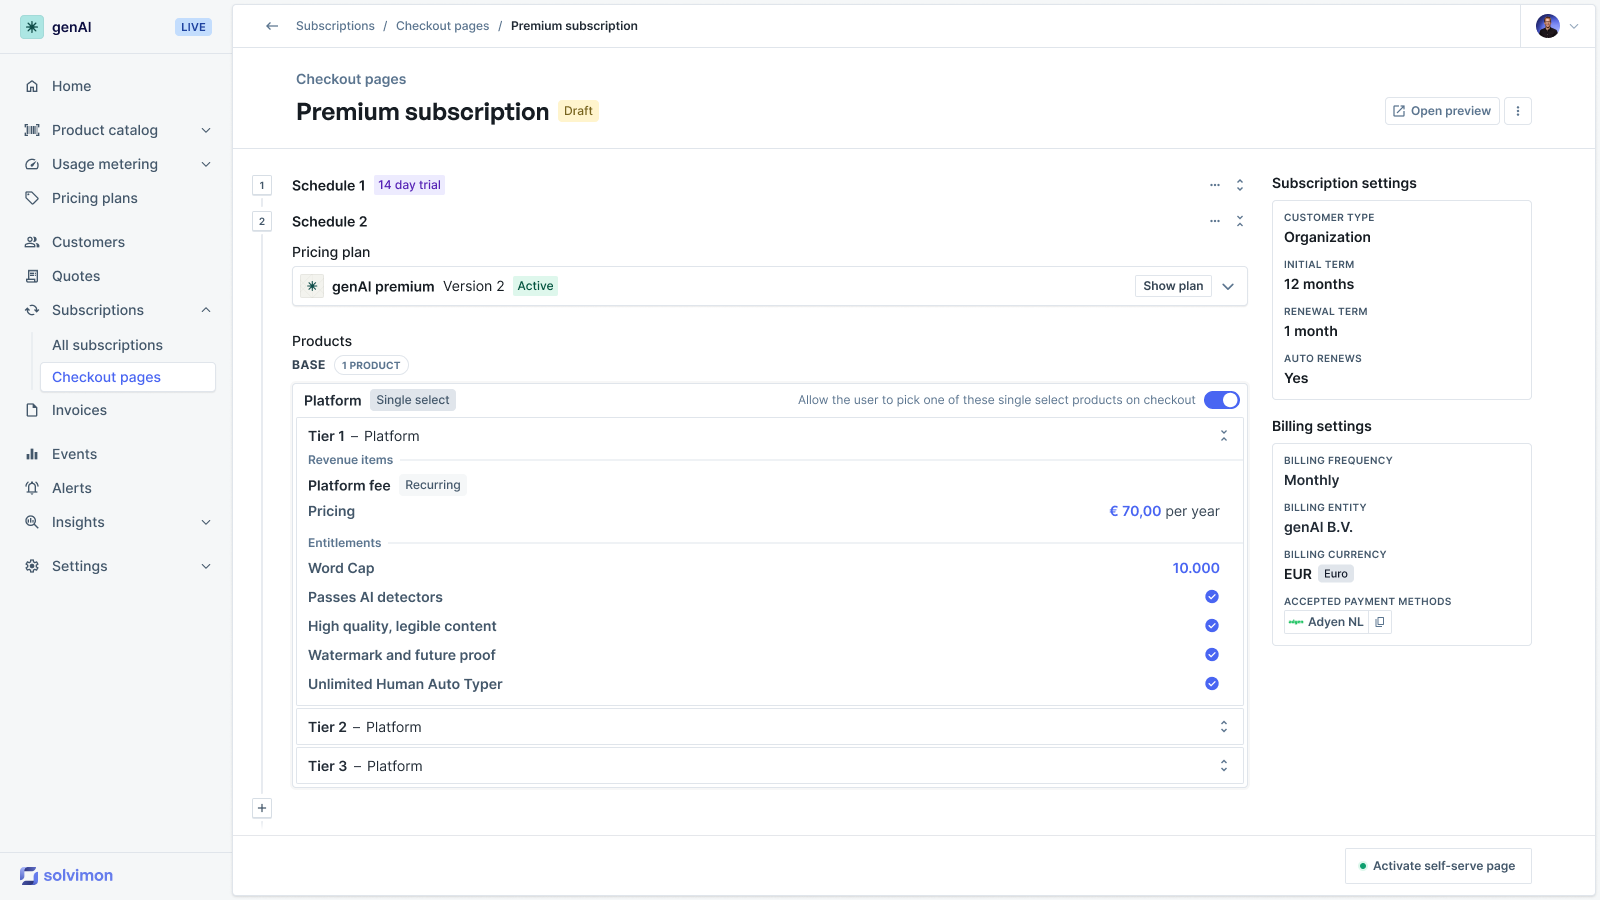
Two controls matter here:
- Allow the user to pick one of these single select products on checkout. Turn this on for a single-select product group, and the customer chooses one of its options on the page. In the example, Tier 1, Tier 2, and Tier 3 each carry their own price and entitlements, and the page prices whichever the customer picks.
- Open preview. Opens the page as a customer sees it, without publishing. Use it to check the plan renders the way you expect before the link goes out.
Subscription and billing settings (customer type, initial and renewal term, billing frequency, billing entity, currency, and accepted payment methods) are shown on the right for reference. They come from the subscription, not from the checkout page.
Activate self-serve page publishes the page and turns the URL on. Until then it stays in Draft and the link does not open.
Express checkout on a product offer
A product offer sells a single product rather than a full subscription, and its checkout is a one-screen express flow: the customer picks a wallet payment method or types their details, and pays.
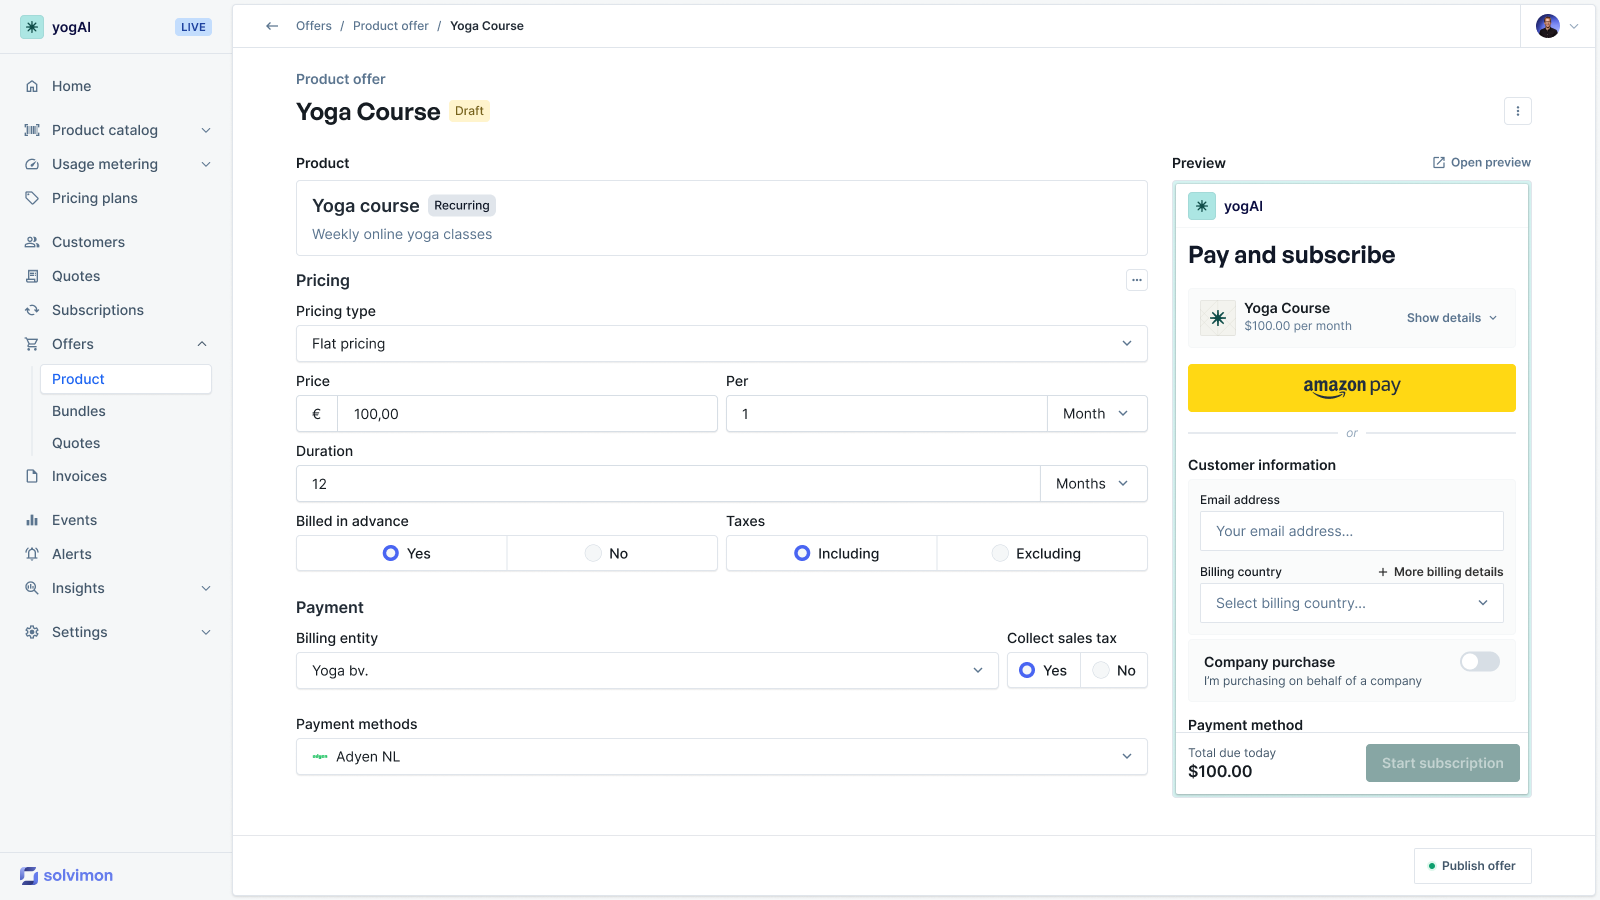
You configure the product, its pricing, duration, whether it is billed in advance, taxes, and the billing entity and payment methods. The preview on the right updates as you change them, so you can see the page the customer will land on. Publish offer makes it live.
Paying through this page creates the user and the customer in one step, the same as a checkout page: there is nothing to set up beforehand.
Branding
The colours, logo, square logo, and portal display name on the page come from Settings > Branding in Desk, not from the checkout page itself. See Branding.
Pre-fill values with URL parameters
Append query parameters to the checkout link to pre-fill the form. Solvimon reads them on load, before the customer interacts with the page.
The same parameters work when you embed the Checkout screen with the SDK instead of using the hosted page.
After the payment
success_url is where Solvimon sends the customer once payment succeeds.
Treat that redirect as a convenience for the customer, not as your record of the sale. It happens in the customer’s browser, so someone who closes the tab after paying never triggers it.
Do not grant paid access based on the success_url request. Confirm the subscription server-side through the API or a webhook first.
Revoking a link
To stop a checkout link from working, revoke it:
The link then reports status: "REVOKED" and no longer opens. Revoke and recreate when you change what you are selling, so nobody checks out on old terms. In Desk, this is Void in the row menu on the Checkout pages list.
Things to know
- One link, one subscription. The link is tied to the pricing plan subscription you created it for. Selling a second plan means a second link.
- Abandoned checkouts cost nothing. A visitor who leaves without paying creates no customer and no invoice.
- US and Canada need a full address. Tax there depends on the address, so the page requires it before payment.
- Test and live are separate. A link created with a test API key only accepts test payments and creates test data.